How to Create and Publish Your First Product Recommendation Quiz
Follow these steps to create your first quiz with the RevenueHunt app.
Tutorial
Follow our introduction video tutorial to get a quick overview of the app.
Ask Quiz Copilot
Open a chat with Quiz Copilot and ask it to create a quiz for you. It's amazing at creating quizzes and can help you with the entire process.
Step 1: Create a New Quiz
-
Add new quiz: Go to the app’s dashboard and click
Create new quiz.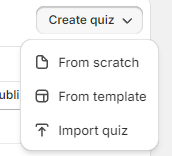
-
Choose a template: Choose a pre-defined template, generate with AI or start from scratch.
- Name your quiz: The name can be edited later.
- Redirect to Quiz Builder: After that, you'll be redirected to the Quiz Builder.
Ask Quiz Copilot
Open a chat with Quiz Copilot and ask it to create a quiz for you. It's amazing at creating quizzes and can help you with the entire process.
- Add new quiz: Go to the app’s dashboard and click
+ new quiz. - Choose a template: Choose a pre-defined template or start from scratch.
- Name your quiz: The name can be edited later.
- Redirect to Quiz Builder: After that, you'll be redirected to the Quiz Builder.
- Add new quiz: Go to the app’s dashboard and click
+ new quiz. - Choose a template: Choose a pre-defined template or start from scratch.
- Name your quiz: The name can be edited later.
- Redirect to Quiz Builder: After that, you'll be redirected to the Quiz Builder.
- Add new quiz: Go to the app’s dashboard and click
+ new quiz. - Choose a template: Choose a pre-defined template or start from scratch.
- Name your quiz: The name can be edited later.
- Redirect to Quiz Builder: After that, you'll be redirected to the Quiz Builder.
- Add new quiz: Go to the app’s dashboard and click
+ new quiz. - Choose a template: Choose a pre-defined template or start from scratch.
- Name your quiz: The name can be edited later.
- Redirect to Quiz Builder: After that, you'll be redirected to the Quiz Builder.
- Add new quiz: Go to the app’s dashboard and click
+ new quiz. - Choose a template: Choose a pre-defined template or start from scratch.
- Name your quiz: The name can be edited later.
- Redirect to Quiz Builder: After that, you'll be redirected to the Quiz Builder.
Step 2: Manage Questions
In Quiz Builder you'll be able to add questions to your quiz.
- Add slides: To add a question, click the
+button or hover over an existing question and click the+ new questionbutton. Select a question type from the dropdown. - Delete slides: To delete a question, click the
.../more optionsbutton (three dots) and select Delete/Remove.
In Quiz Builder > Questions you'll be able to add questions to your quiz.
-
Add questions: To add a question, click the
+ Add questionbutton. Select a question type from the dropdown.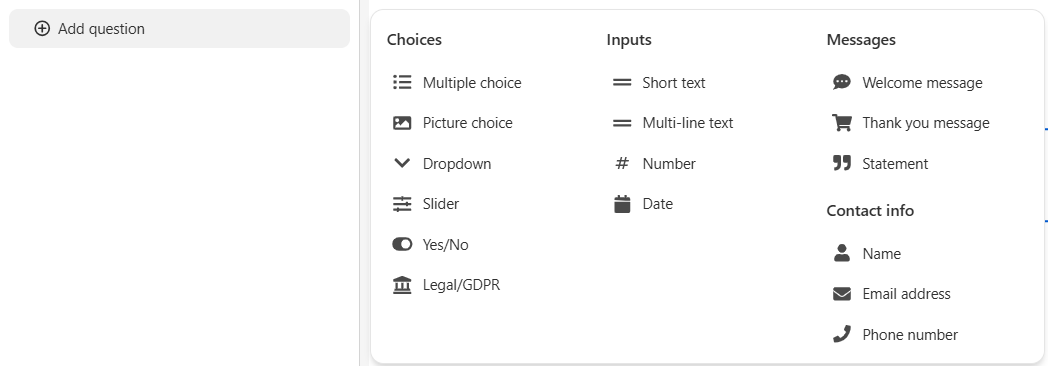
-
Add blocks: You can add multiple different blocks to a single question slide such as text, images, videos, etc.
- Delete slides: To delete a question, click the
🗑 Remove questionbutton in question settings.
In Quiz Builder you'll be able to add questions to your quiz.
- Add slides: To add a question, click the
+button or hover over an existing question and click the+ new questionbutton. Select a question type from the dropdown. - Delete slides: To delete a question, click the
.../more optionsbutton (three dots) and select Delete/Remove.
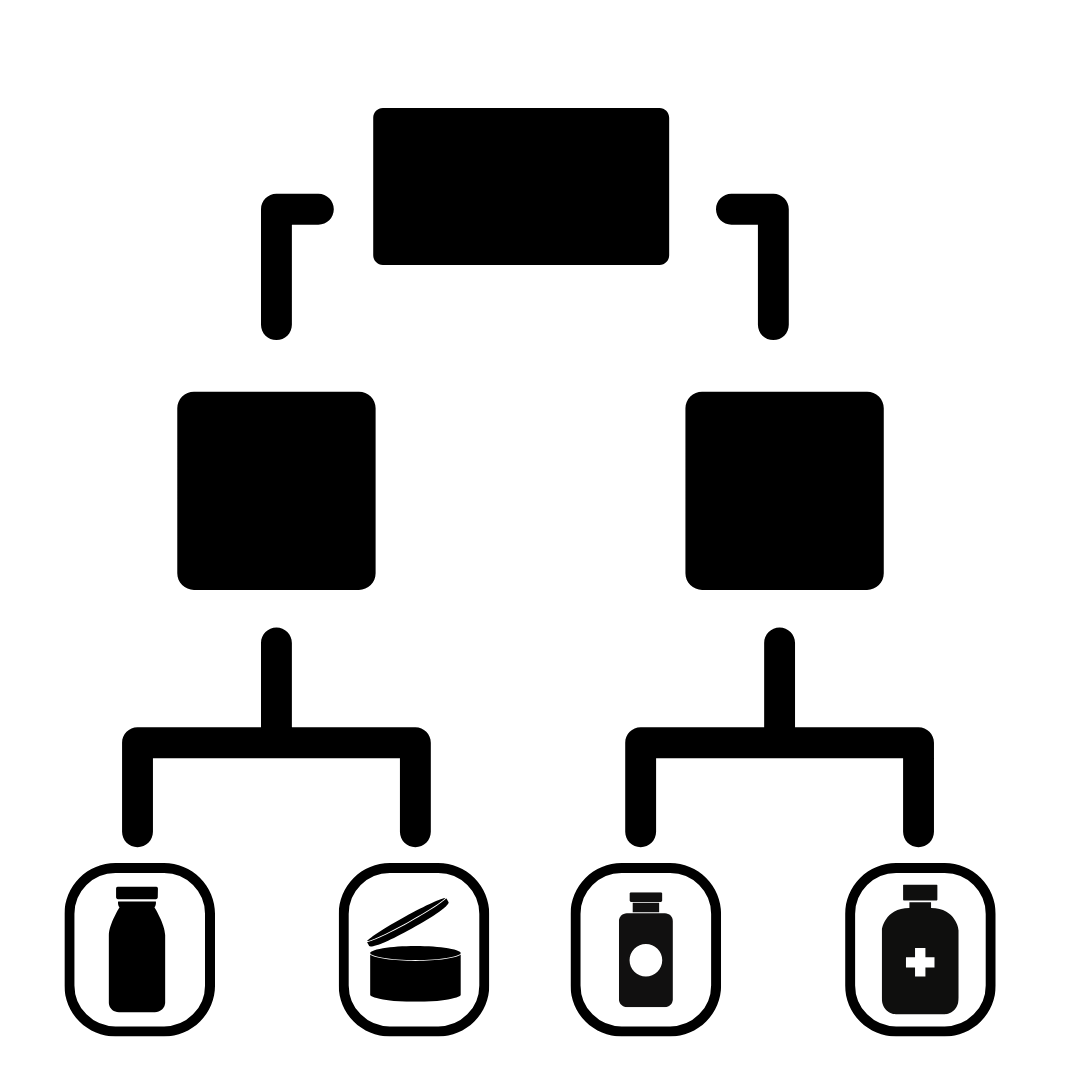
Step 3: Set up Product Recommendations
Once you have your questions, you'll have to decide how to set up product recommendations that should be shown at the end of the quiz.
You can choose to:
Option 1: Recommend most voted products based on the customer's answers (recommended for most quizzes)
In this setup, you'll have to:
- Link products or collections to each choice in the quiz.
- On the Results Page, add a product block that will recommend the most voted products based on the customer's answers.
- You can also sort recommendations into multiple product slots to show a complete product routine.
Option 2: Set up a custom varaible or a score that will determine what recommendations should be shown (recommended for personality-type quizzes)
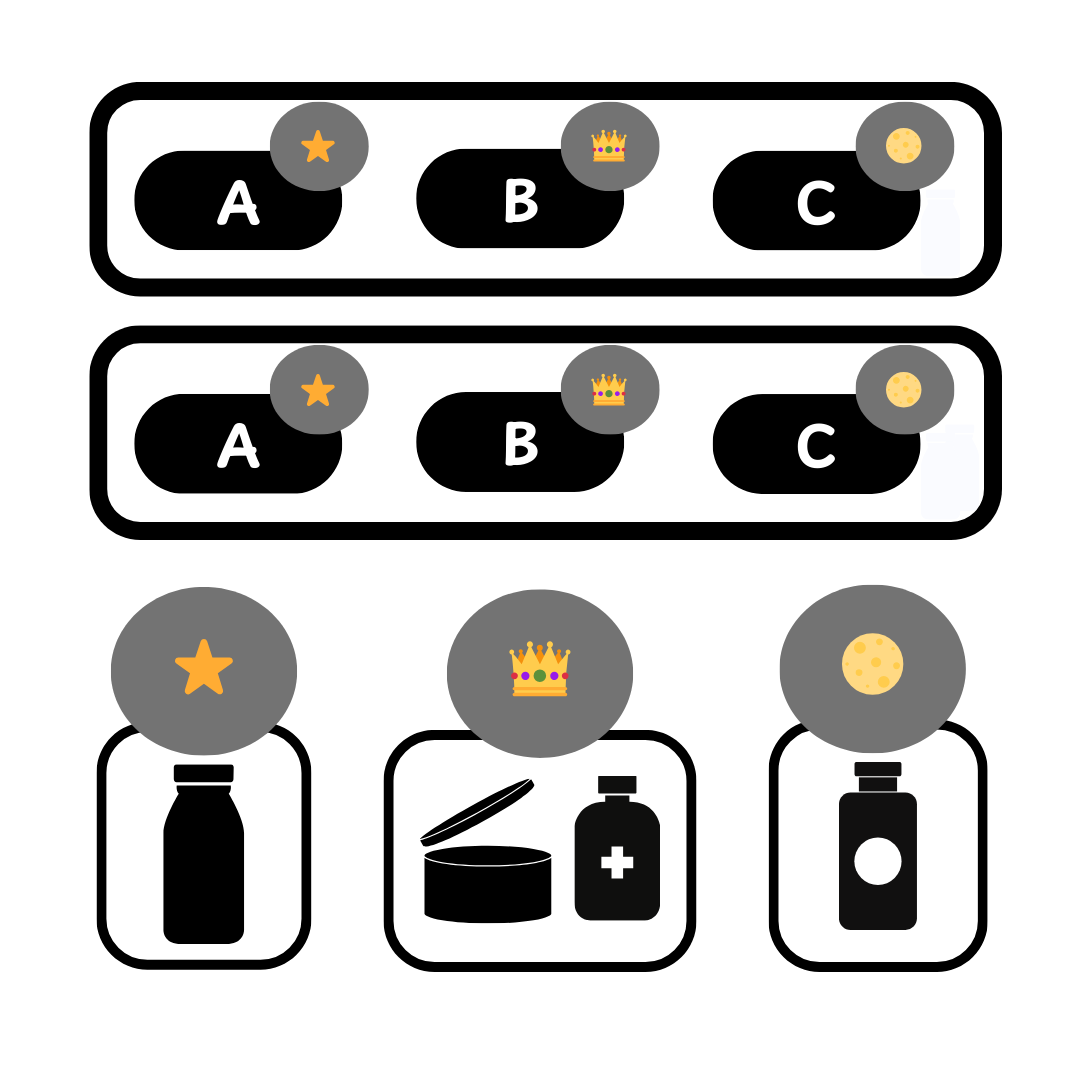
In this setup, you'll have to:
- Create a custom variable or a score for each choices in the quiz.
- On the Results Page, set up multiple sections with fixed recommendations and content.
- To each section, add display logic to tell it when to be shown or hidden based on the final score or variable with the most votes.
- For example, show Section 1 if the varaibkle with the highest score is "blue" and Section 2 if the varaibkle with the highest score is "red".
Option 3: Set up a complex logic tree or add display logic to sections on the results page that will determine what recommendations should be shown (recommended for quizzes with complex logic and recommendations matrix)
In this setup, you'll have to either:
- Create complex logic branching in the quiz that leads the user to different results pages with fixed recomemendations and text
- Create one results page with multple sections and via display logic tell each section when to be shown or hidden based on the customer's answers.
Tip
If you're not sure which option to choose, check out our How to Set Up Recommendations guide that contains a decision tree to help you choose the best option for your quiz.
Once you have your questions, you'll have to link products to choices to show recommendations to the customer.
- Go to Link Products/Collections/Choice Settings tab: In the Quiz Builder, select a choice and go to Link Products/ Link Collections / Choice Settings tab.
- Upvote Products: Link product variants or collections to each choice. This determines the product recommendations based on customer responses. In the end, the Results Page will display the products sorted by the number of votes.
- Edit the Results Page: Go to the Results Page tab and edit the content. You can change the number of recommended products in the Product Block settings.
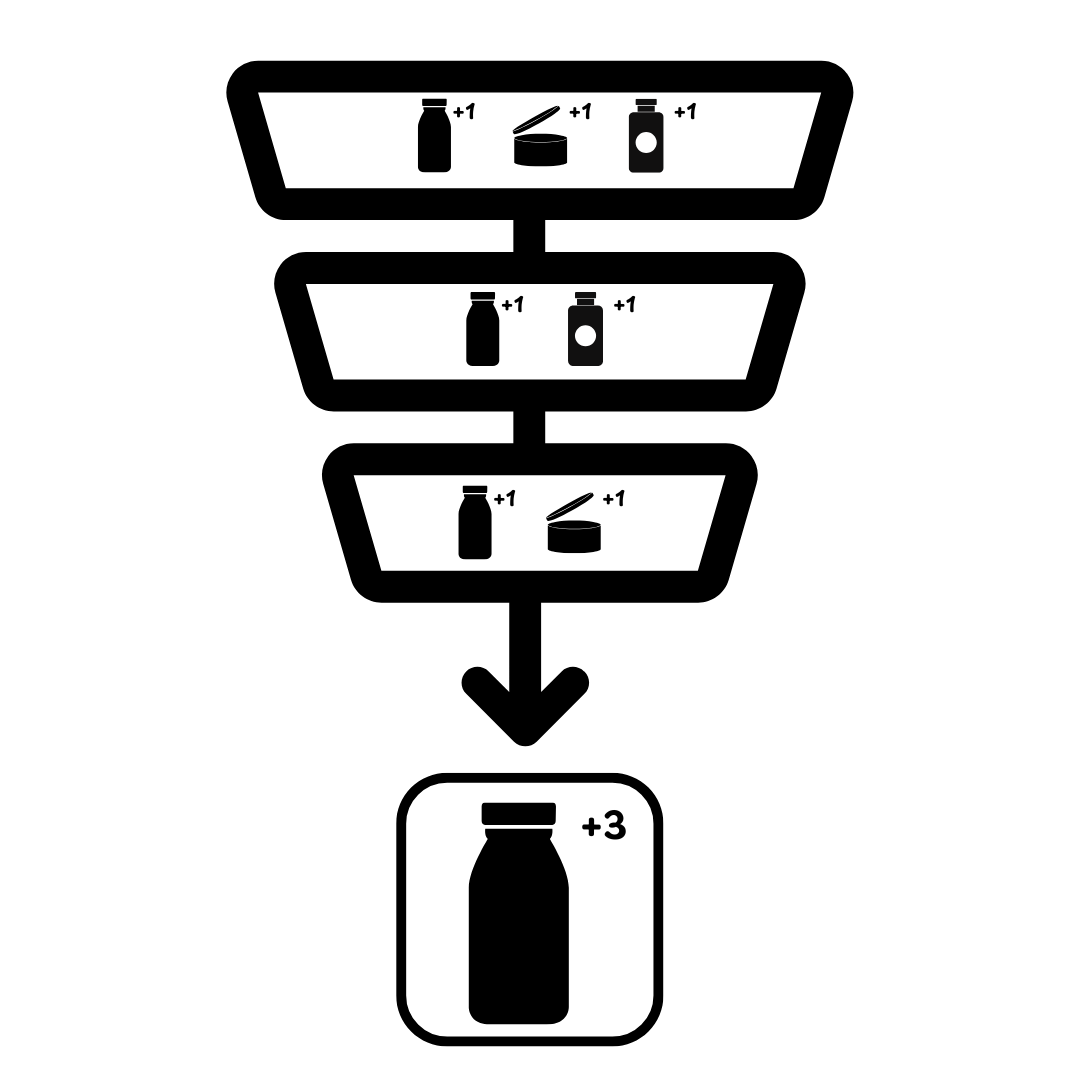
How do I get the right recommendations?
Our product recommendation algorithm works like a voting system:
- Products are linked to each choice
- When a customer picks a choice, all linked products receive one vote
- After the customer takes the quiz, the results page will show the most voted products sorted by the number of votes
- If no products have been linked or all the products have been excluded, the results page will appear empty
- If there's a draw in the number of votes, the app will randomize the order of products.
If you want to make the results ultra-precise, you can also:
- Limit the recommendations to only show products that received X votes or more in the Results Page settings.
- Use Exclusions to make sure that unwanted products are not shown (even if they were upvoted in another choice earlier).
Read more about how the recommendations work here.
Once you have your questions, you'll have to link products to choices to show recommendations to the customer.
- Go to Link Products/Collections/Choice Settings tab: In the Quiz Builder, select a choice and go to Link Products/ Link Collections / Choice Settings tab.
- Upvote Products: Link product variants or collections to each choice. This determines the product recommendations based on customer responses. In the end, the Results Page will display the products sorted by the number of votes.
- Edit the Results Page: Go to the Results Page tab and edit the content. You can change the number of recommended products in the Product Block settings.
How do I get the right recommendations?
Our product recommendation algorithm works like a voting system:
- Products are linked to each choice
- When a customer picks a choice, all linked products receive one vote
- After the customer takes the quiz, the results page will show the most voted products sorted by the number of votes
- If no products have been linked or all the products have been excluded, the results page will appear empty
- If there's a draw in the number of votes, the app will randomize the order of products.
If you want to make the results ultra-precise, you can also:
- Limit the recommendations to only show products that received X votes or more in the Results Page settings.
- Use Exclusions to make sure that unwanted products are not shown (even if they were upvoted in another choice earlier).
Read more about how the recommendations work here.
Once you have your questions, you'll have to link products to choices to show recommendations to the customer.
How do I add products to Standalone RevenueHunt App?
Check this how-to article to learn how to add products and collections to the Standalone version of the RevenueHunt app: How to Add Products in Standalone RevenueHunt App.
- Go to Link Products/Collections/Choice Settings tab: In the Quiz Builder, select a choice and go to Link Products/ Link Collections / Choice Settings tab.
- Upvote Products: Link product variants or collections to each choice. This determines the product recommendations based on customer responses. In the end, the Results Page will display the products sorted by the number of votes.
- Edit the Results Page: Go to the Results Page tab and edit the content. You can change the number of recommended products in the Product Block settings.
How do I get the right recommendations?
Our product recommendation algorithm works like a voting system:
- Products are linked to each choice
- When a customer picks a choice, all linked products receive one vote
- After the customer takes the quiz, the results page will show the most voted products sorted by the number of votes
- If no products have been linked or all the products have been excluded, the results page will appear empty
- If there's a draw in the number of votes, the app will randomize the order of products.
If you want to make the results ultra-precise, you can also:
- Limit the recommendations to only show products that received X votes or more in the Results Page settings.
- Use Exclusions to make sure that unwanted products are not shown (even if they were upvoted in another choice earlier).
Read more about how the recommendations work here.
Step 4: Publish & Preview the Quiz
To test the quiz, you'll have to save the changes and preview it.
-
Save the changes: Click
Saveon the top menu. Don't worry, clickingSavewill not automatically add the quiz to your website. It will simply save the changes and allow you to preview the quiz.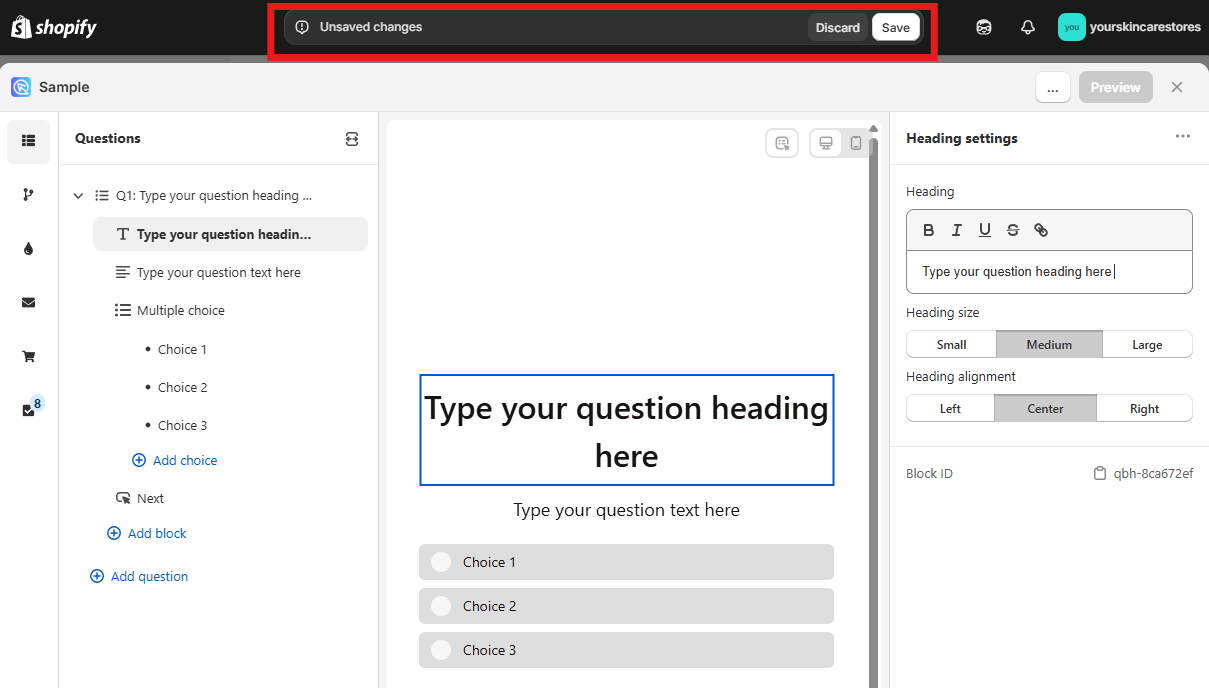
-
Preview the quiz: Click
Previewto test the quiz you've created.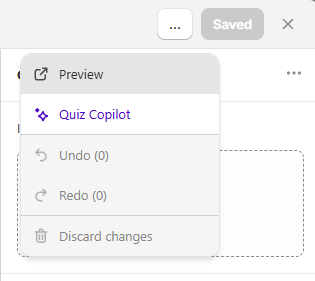
Tip
You can test the quiz as much as you like as long as you always open a new preview window. These test responses done as admin are automatically removed after 1 hour to not add to your usage quota.
To test the quiz, you'll have to save the changes and preview it.
- Publish the changes: Click
Publishon the top-right menu. Don't worry, clickingPublishwill not automatically add the quiz to your website. It will simply save the changes and allow you to preview the quiz. -
Preview the quiz: Click
Previewto test the quiz you've created.Tip
You can test the quiz as much as you like as long as you always open a new preview window. These test responses done as admin are automatically removed after 1 hour to not add to your usage quota.
Step 5: Publish the Quiz on Your website
Once you're satisfied with your quiz, you can put it on your website.
- Publish the quiz: To add the quiz to your store, go the Publish tab from your Dashboard side menu.
-
Pick a publishing method: Pick a publishing method such as a quiz embeded on a new page, homepage or a link popup in the website menu and follow the instructions provided.
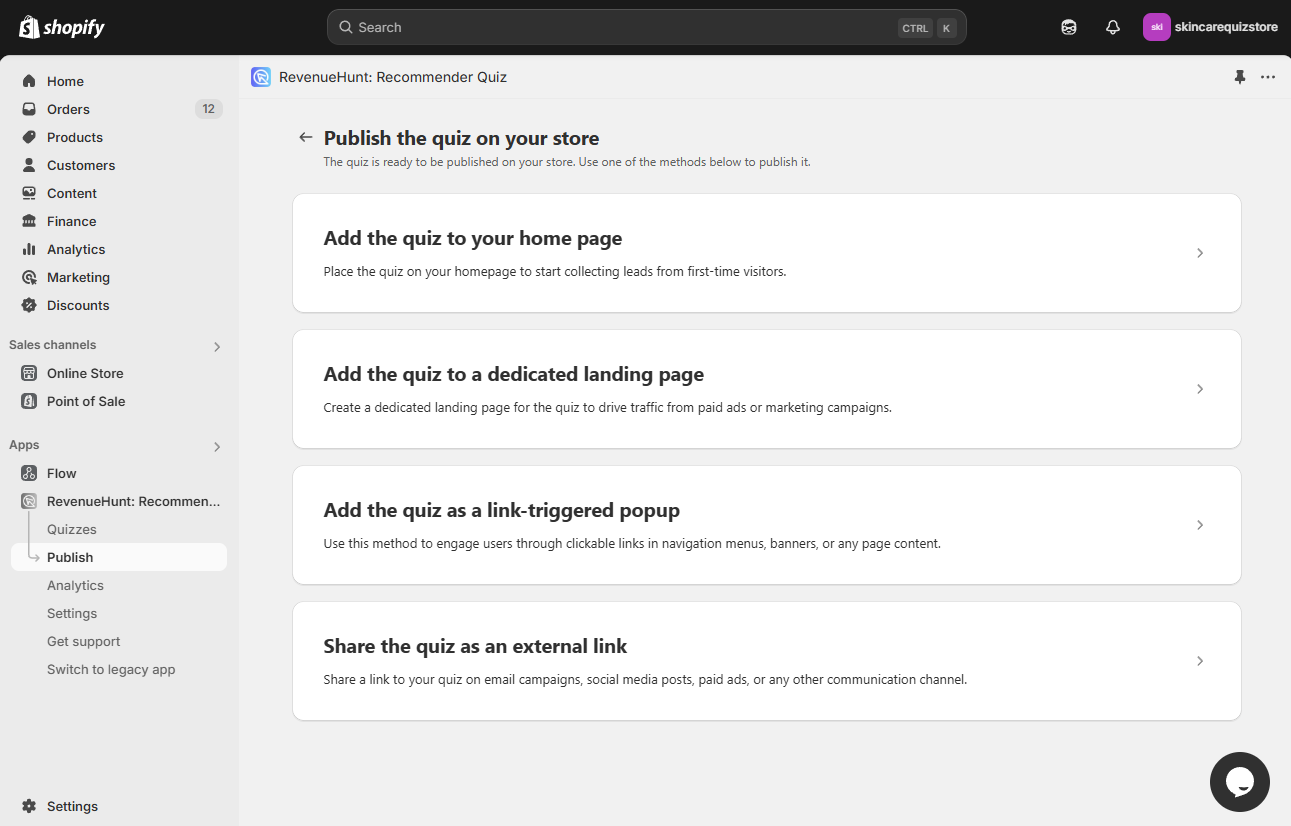
Note
Follow this guide on How to Publish the Quiz on Your Website to learn about different ways the quiz can be added to your website.
Once you're satisfied with your quiz, you can put it on your website.
- Publish the quiz: Follow this guide on How to Publish the Quiz on Your Website to learn about different ways the quiz can be added.
Once you're satisfied with your quiz, you can put it on your website.
- Publish the quiz: Follow this guide on How to Publish the Quiz on Your Website to learn about different ways the quiz can be added.
Once you're satisfied with your quiz, you can put it on your website.
- Publish the quiz: Follow this guide on How to Publish the Quiz on Your Website to learn about different ways the quiz can be added.
Once you're satisfied with your quiz, you can put it on your website.
- Publish the quiz: Follow this guide on How to Publish the Quiz on Your Website to learn about different ways the quiz can be added.
Once you're satisfied with your quiz, you can put it on your website.
- Publish the quiz: Follow this guide on How to Publish the Quiz on Your Website to learn about different ways the quiz can be added.
After Publishing
If changes are made post-publishing, click Save again to update the live quiz.
If changes are made post-publishing, click Publish again to update the live quiz.
If changes are made post-publishing, click Publish again to update the live quiz.
If changes are made post-publishing, click `Publish again to update the live quiz.
If changes are made post-publishing, click Publish again to update the live quiz.
If changes are made post-publishing, click Publish again to update the live quiz.
This guide outlines the steps to create and launch a Product Recommendation Quiz for your store.