How to Add Product Metafields/Attributes
A metafield, called an attribute in some stores, holds a product property your store does not show by default. This article explains how to put one on the quiz results page, and how to build collections from metafield values.
Show a metafield on the results page
Metafields hold product properties that a storefront does not show by default. A cosmetic product sold in Germany, for example, has to show the "Grundpreis", the per 100ml price.
The metafield needs Storefront API access
Open the metafield definition in Shopify and make it readable through the Storefront API. Without that, the live quiz cannot read the value.
What the app can read
The app syncs and shows string, single_line_text_field, multi_line_text_field, date and number metafields. rich_text_field is not supported.
Inside a variant slot, a metafield block shows the parent product's metafield, not a variant-level one.
-
Open the Results page tab in the Quiz builder.
-
Add a Product block and open its settings.
-
In
Product components layout, click+ blockand addMetafield.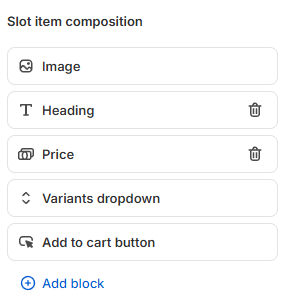
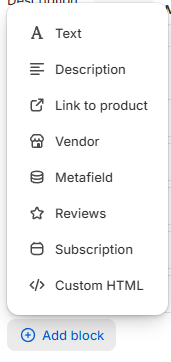
-
Pick the metafield under
Select metafield.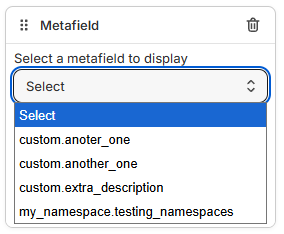
-
Click the top-right
Savebutton.
The metafield then shows in the product block, alongside the rest of the product.
Put the value inside a sentence of your own
Add a Text block to the product layout, and insert the metafield as a content dynamic source.
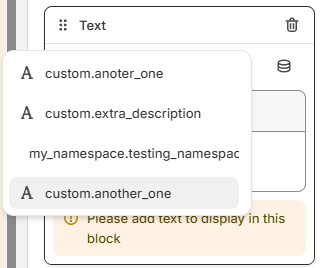
A metafield missing from the list
Force a catalog sync. Open App settings > Catalog and click Import catalog.
A unit price needs no metafield
Unit price is a setting of its own, under Slot item composition.
Metafields hold product properties that a storefront does not show by default. A cosmetic product sold in Germany, for example, has to show the "Grundpreis", the per 100ml price.
What the app can read
This version syncs and shows custom text metafields only.
-
Open
Individual Product Settingsand turn on theshow metafieldstoggle.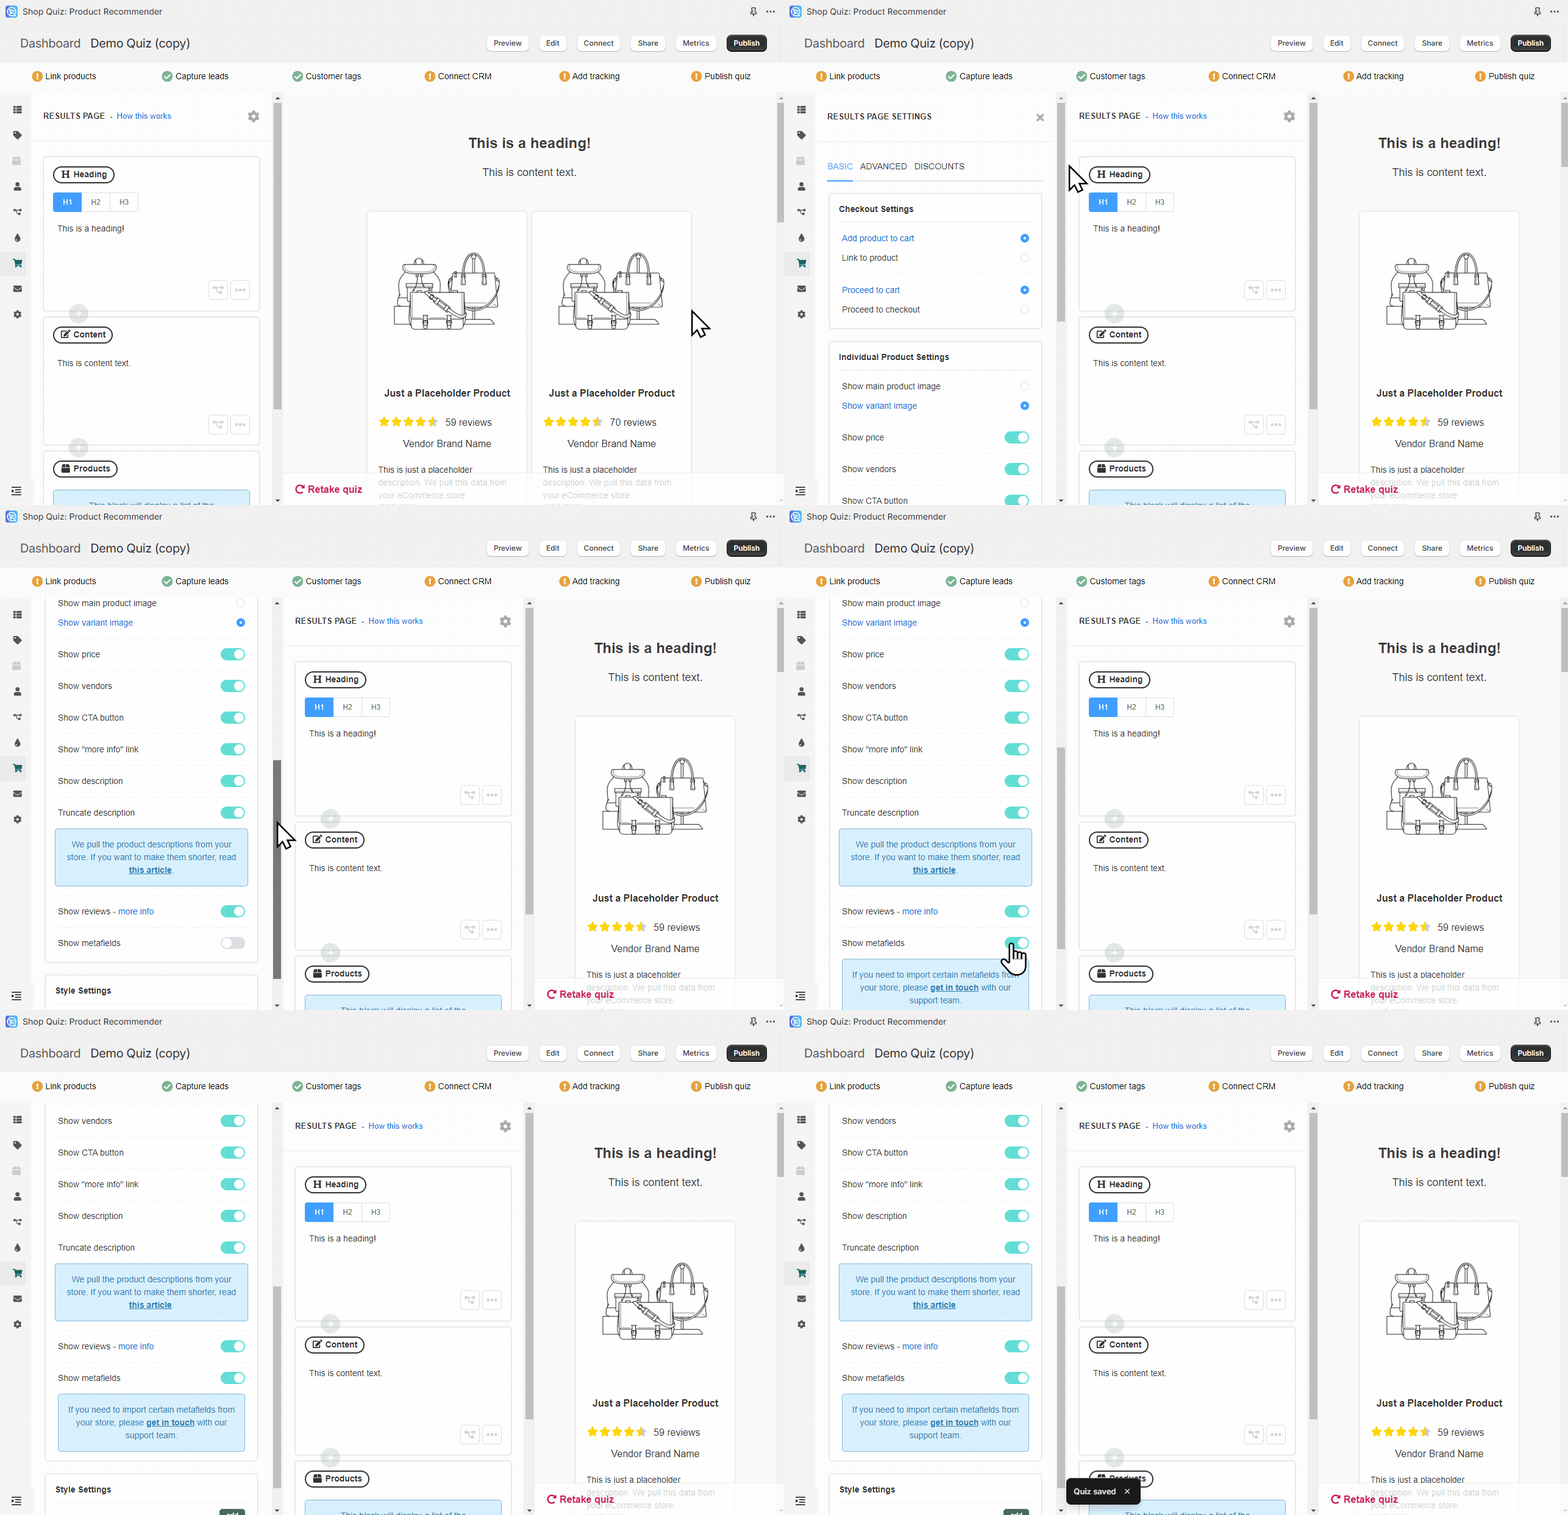
-
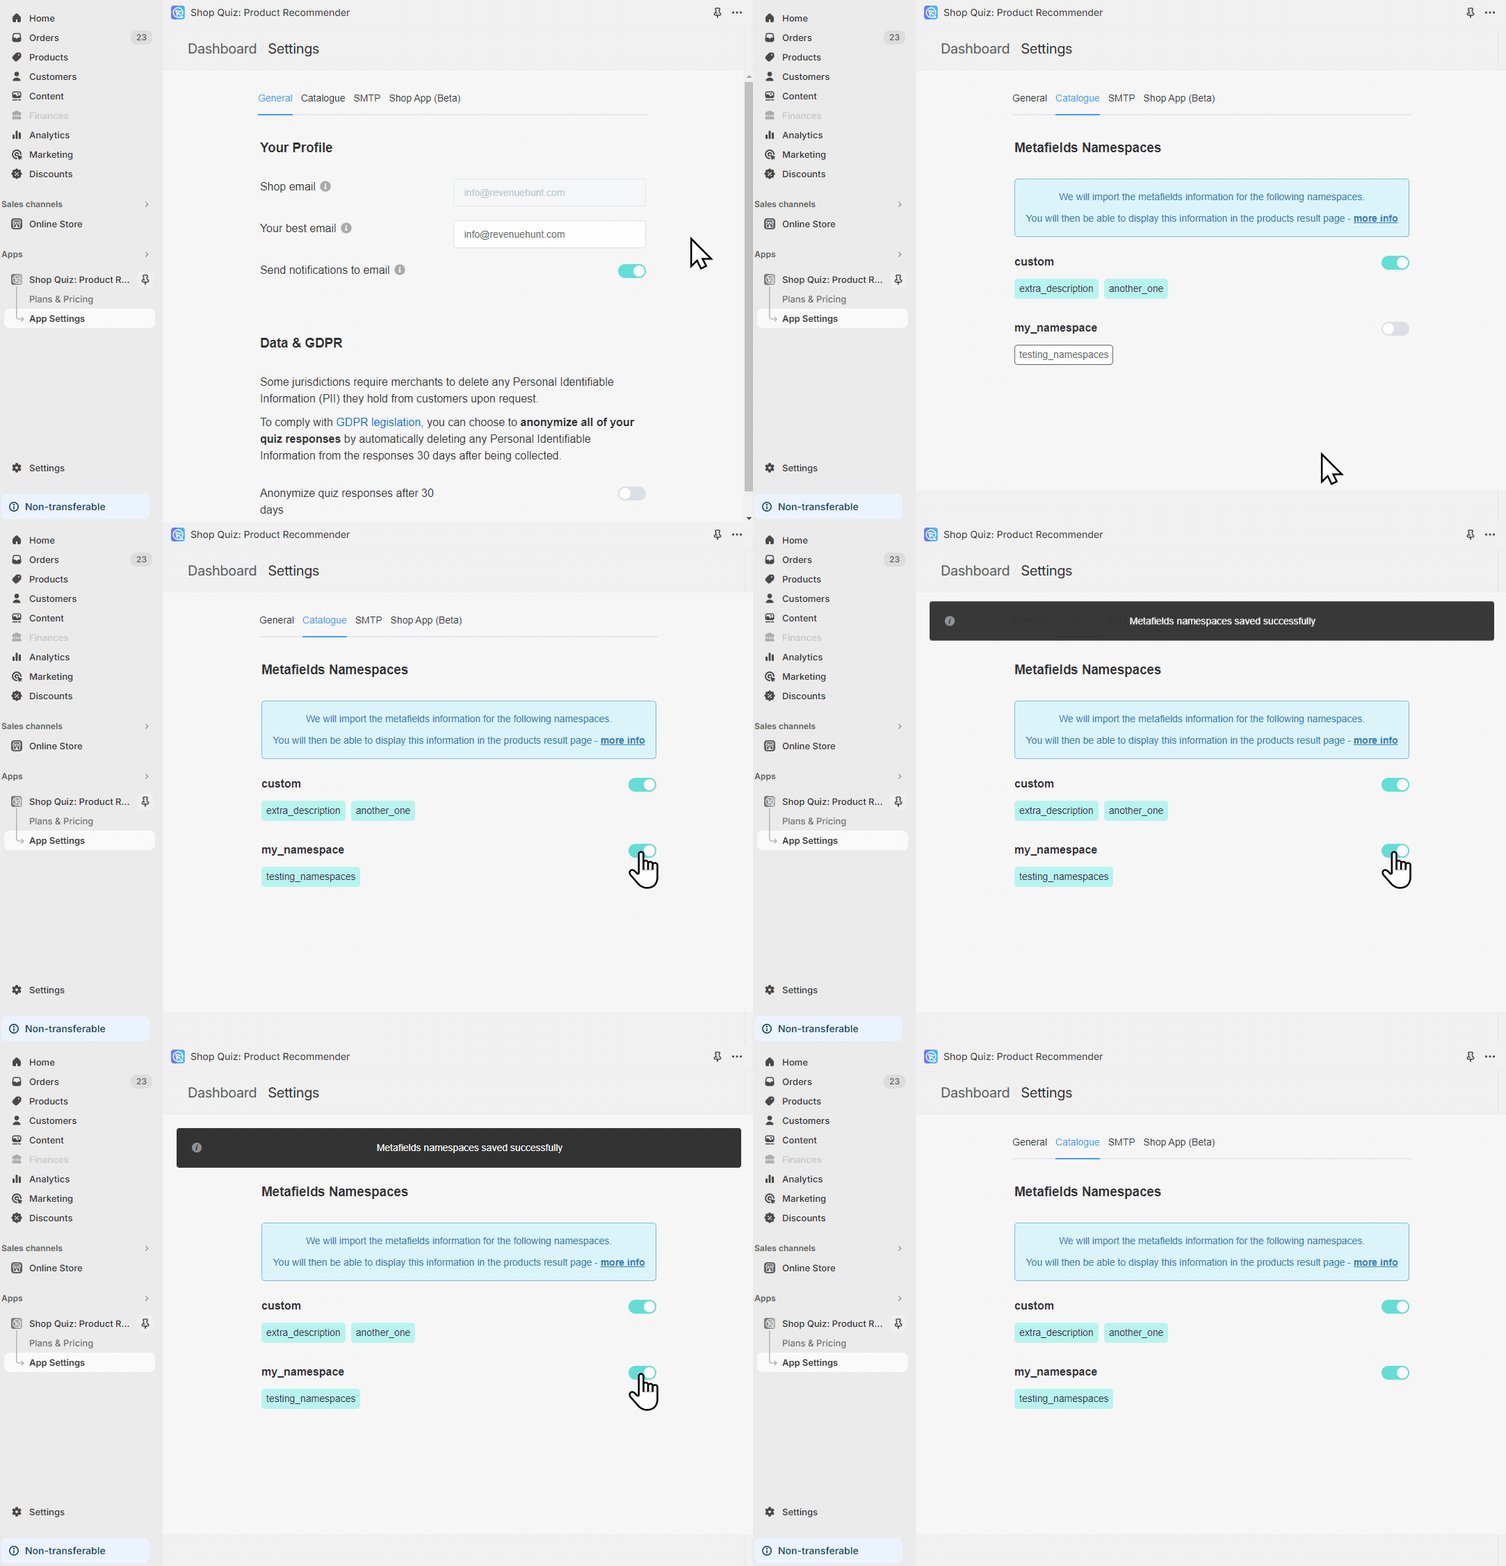
Open App Settings > Catalogue.
-
Turn on the toggle beside every metafield namespace you want to sync.
-
Run a catalog sync from your dashboard.
-
Ask your developer to render the metafield with custom JavaScript. Nothing appears on the results page until they do.
Outside the support scope
This version does not place the values on the results page for you, and the code that does it is not covered by app support.
The sample below appends the
descriptors-subtitlevalue to each recommended product. It goes in the Custom JavaScript field, under Results Page Settings > Advanced Settings.window.recommendedProducts = prq.recommendedProducts(); var products = document.querySelectorAll('.lq-product'); for (let i = 0; i < products.length; i++) { let id = products[i].id; let oneId = id.match(/^\d/) ? ("#\\3" + id.charAt(0) + " " + id.substring(1)) : "#" + id; let product = window.recommendedProducts.find(product => product.id === id); if (product.metafields['descriptors-subtitle']) { let toEdit = document.querySelectorAll(oneId + ' .lq-hcont'); for (let j = 0; j < toEdit.length; j++) { if (!toEdit[j].hasAttribute("edited")) { toEdit[j].insertAdjacentHTML('beforeend', '<span>' + product.metafields['descriptors-subtitle'] + '</span>'); toEdit[j].setAttribute("edited", "true"); } } } }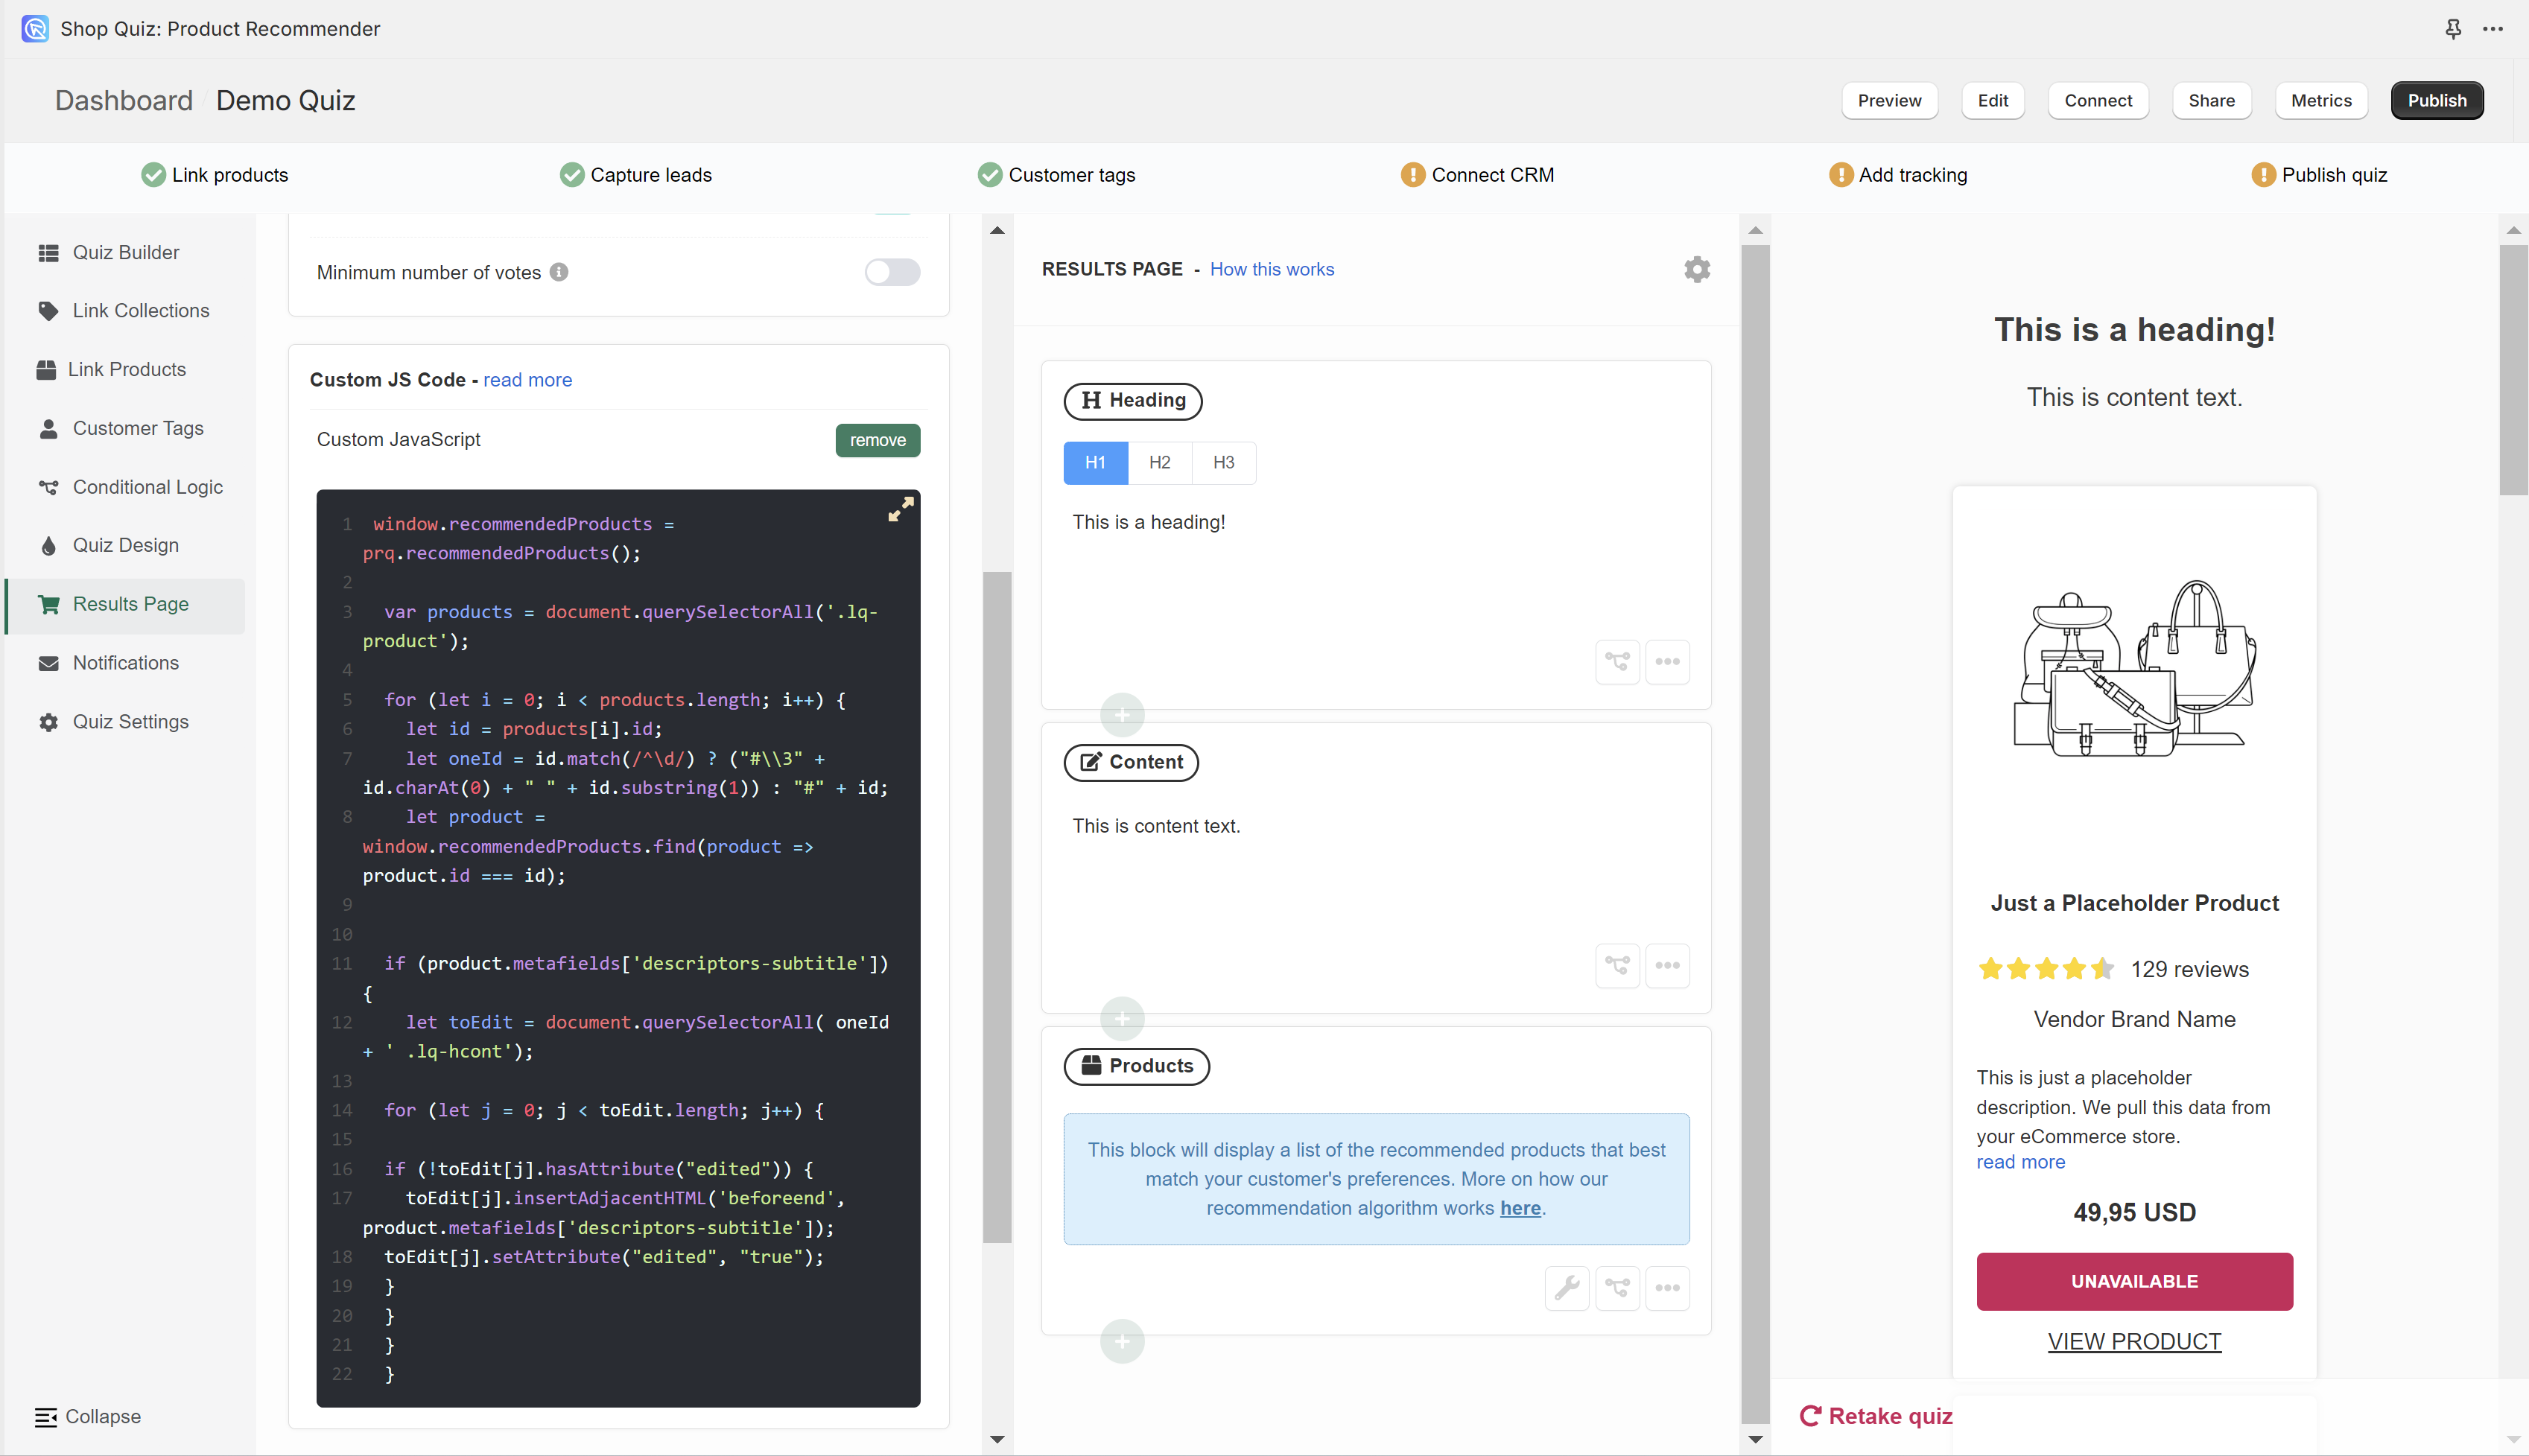
Attributes in WooCommerce hold product properties that a storefront does not show by default. A cosmetic product sold in Germany, for example, has to show the "Grundpreis", the per 100ml price.
-
Open
Individual Product Settingsand turn on theshow metafieldstoggle. -
Open App Settings > Catalogue.
-
Turn on
Pass attribute information to result page.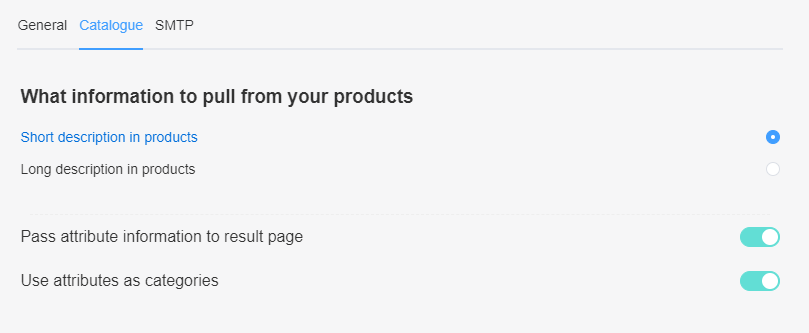
-
Run a catalog sync from your dashboard.
-
Ask your developer to render the attribute with custom JavaScript. Nothing appears on the results page until they do.
Outside the support scope
This version does not place the values on the results page for you, and the code that does it is not covered by app support.
The sample below appends the
descriptors-subtitlevalue to each recommended product. It goes in the Custom JavaScript field, under Results Page Settings > Advanced Settings.window.recommendedProducts = prq.recommendedProducts(); var products = document.querySelectorAll('.lq-product'); for (let i = 0; i < products.length; i++) { let id = products[i].id; let oneId = id.match(/^\d/) ? ("#\\3" + id.charAt(0) + " " + id.substring(1)) : "#" + id; let product = window.recommendedProducts.find(product => product.id === id); if (product.metafields['descriptors-subtitle']) { let toEdit = document.querySelectorAll(oneId + ' .lq-hcont'); for (let j = 0; j < toEdit.length; j++) { if (!toEdit[j].hasAttribute("edited")) { toEdit[j].insertAdjacentHTML('beforeend', '<span>' + product.metafields['descriptors-subtitle'] + '</span>'); toEdit[j].setAttribute("edited", "true"); } } } }
Not available on this platform
This version of the app does not import product attributes, so they cannot be shown on the results page.
Not available on this platform
This version of the app does not import product custom fields, so they cannot be shown on the results page.
Not available on this platform
This version has no store to import metafields from. Add the product details you need straight into the Catalogue, as how to add products in Standalone RevenueHunt app describes.
Use metafields as smart collections
Shopify can use a product metafield as the condition of a smart collection. Group products by a property such as Skin Concern = Acne or Subscription Eligible = True, then point a quiz choice at the collection.
Metafield types a smart collection accepts
- Single line text
- Single line text (list)
- True or false (boolean)
- Integer
- Decimal
- Rating
See the Shopify documentation on smart collections from metafields.
-
In your Shopify admin, go to
Settings > Custom data > Productsand clickAdd definition. Pick one of the types above and give it a clear name, such asSkin Concern,Organic CertifiedorSPF Rating. -
Open a product, scroll to
Metafields, and fill the value in. For exampleSkin Concern = Acne. Repeat for every product it applies to. -
Go to
Products > Collectionsand clickCreate collection. -
Choose
Automated collection. -
Under
Conditions, selectProduct metafields, pick your metafield, and set the test. For exampleSkin ConcernequalsAcne. -
Save the collection. Shopify now keeps it up to date as products change.
-
Open your quiz, edit a question and add a choice.
-
Link the new collection to that choice, instead of picking products one by one. An answer of
Acne-prone skinthen points at theSkin Concern = Acnecollection. -
Click the top-right
Savebutton.
Shopify can use a product metafield as the condition of a smart collection. Group products by a property such as Skin Concern = Acne or Subscription Eligible = True, then point a quiz choice at the collection.
Metafield types a smart collection accepts
- Single line text
- Single line text (list)
- True or false (boolean)
- Integer
- Decimal
- Rating
See the Shopify documentation on smart collections from metafields.
-
In your Shopify admin, go to
Settings > Custom data > Productsand clickAdd definition. Pick one of the types above and give it a clear name, such asSkin Concern,Organic CertifiedorSPF Rating. -
Open a product, scroll to
Metafields, and fill the value in. For exampleSkin Concern = Acne. Repeat for every product it applies to. -
Go to
Products > Collectionsand clickCreate collection. -
Choose
Automated collection. -
Under
Conditions, selectProduct metafields, pick your metafield, and set the test. For exampleSkin ConcernequalsAcne. -
Save the collection. Shopify now keeps it up to date as products change.
-
Run a catalog sync from your dashboard.
-
Open the Link Collections tab in the Quiz Builder and link the collection to a choice.
-
Click the top-right
Publishbutton.
A WooCommerce attribute can act as a category, so a quiz choice points at every product carrying that attribute value.
-
Open App Settings > Catalogue.
-
Turn on
Use attributes as categories. -
Run a catalog sync from your dashboard.
-
Open the Link Categories tab in the Quiz Builder and link an attribute to a choice.
-
Click the top-right
Publishbutton.
Not available on this platform
This version cannot build a collection from product attributes on its own.
Create the categories you need in your store, then link them to a choice in the Link Categories tab.
Not available on this platform
This version cannot build a collection from product attributes on its own.
Create the categories you need in your store, then link them to a choice in the Link Categories tab.
Not available on this platform
This version has no store to build collections from. Create them by hand in the Catalogue instead.
This article explains how to show a product metafield on the quiz results page. It also covers building collections from metafield values.