How to Integrate Meta Pixel with Quiz
The Meta Pixel records what customers do in your quiz, so you can measure your Facebook ads against it and build audiences from the answers.
What is the Meta Pixel?
A small piece of code on your website. It records conversions from your ads, feeds later campaigns, and builds audiences out of the people who have already visited.
Give the quiz its own page
Pixel tracking works best when the quiz sits on a page of its own. See how to embed an inline quiz on your store.
Connect the Meta Pixel to your quiz
-
Create a Meta Pixel, if you do not have one. See the Meta Pixel setup documentation, then add it to your website.
-
In your Shopify admin, go to
Settings > Customer eventsand check the Meta Pixel is there. If it is not, add it with the Facebook and Instagram app. -
Open the Facebook and Instagram app, go to
Settings, and setShared datatoMaximum. Advanced and custom events are not sent at a lower setting. -
Choose or create the data set that will receive the events.
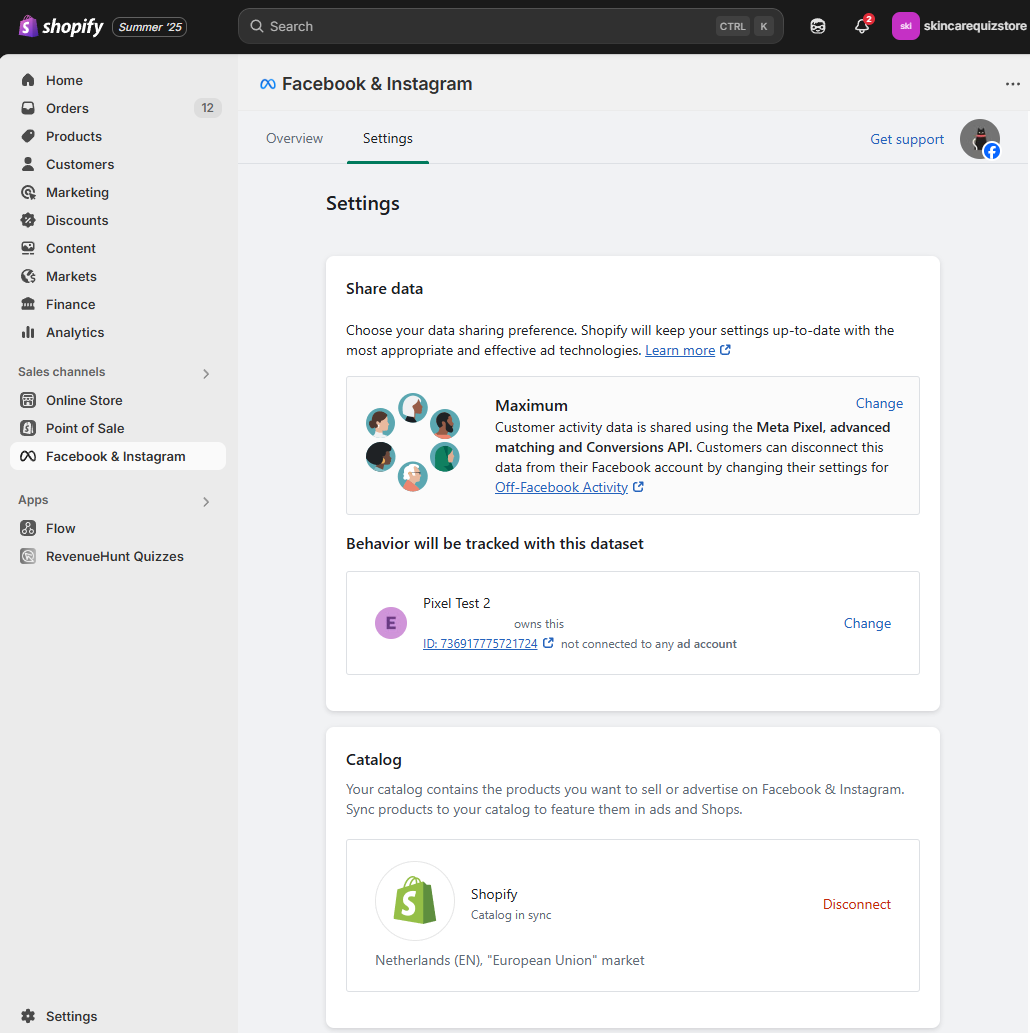
Creating a data set
Go to business.facebook.com, then
Ads Manager > Events Manager > Data sources > Create data source. -
Publish the quiz on your store.
-
Open the Integrations tab of your quiz, find Meta Pixel, and click
Activate.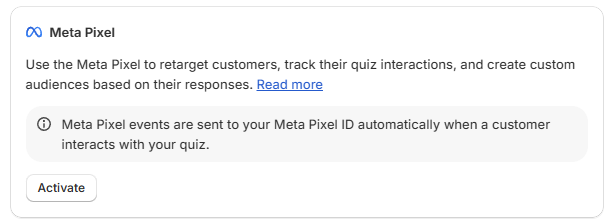
-
Click
Save. The quiz connects to the Pixel already on your website, so there is no Pixel ID to enter. -
Open the Facebook and Instagram app, go to
Settings, and open your data set to reach the Meta Events Manager. ClickTest events, enter your website URL, then take the quiz on your site. Events such asViewContent,LeadandRetakeQuizshould appear as you go.If they do, the Pixel is connected.
-
Review the custom events before you use them in an ad. See Review custom events.
-
Create a Meta Pixel, if you do not have one. See the Meta Pixel setup documentation, then add it to your website.
-
In your Shopify admin, go to
Settings > Customer eventsand check the Meta Pixel is there. If it is not, add it with the Facebook and Instagram app. -
Open the Facebook and Instagram app, go to
Settings, and setShared datatoMaximum. Advanced and custom events are not sent at a lower setting. -
Choose or create the data set that will receive the events.
Creating a data set
Go to business.facebook.com, then
Ads Manager > Events Manager > Data sources > Create data source. -
Publish the quiz on your store.
-
Open the Connect tab of your quiz, find Meta Pixel, and click
connect. -
Enter your
Meta Pixel ID. It has to match the Pixel behind the data set you chose in the Facebook and Instagram app. -
Open the Facebook and Instagram app, go to
Settings, and open your data set to reach the Meta Events Manager. ClickTest events, enter your website URL, then take the quiz on your site. Events such asViewContent,LeadandRetakeQuizshould appear as you go.If they do, the Pixel is connected.
-
Review the custom events before you use them in an ad. See Review custom events.
-
Create a Meta Pixel, if you do not have one. See the Meta Pixel setup documentation, then add it to your website.
-
Open the Connect tab of your quiz, find Meta Pixel, and click
connect. -
Enter your
Meta Pixel ID. -
Open the Meta Events Manager. Click
Test events, enter your website URL, then take the quiz on your site. Events such asViewContent,LeadandRetakeQuizshould appear as you go.If they do, the Pixel is connected.
-
Review the custom events before you use them in an ad. See Review custom events.
-
Create a Meta Pixel, if you do not have one. See the Meta Pixel setup documentation, then add it to your website.
-
Open the Connect tab of your quiz, find Meta Pixel, and click
connect. -
Enter your
Meta Pixel ID. -
Open the Meta Events Manager. Click
Test events, enter your website URL, then take the quiz on your site. Events such asViewContent,LeadandRetakeQuizshould appear as you go.If they do, the Pixel is connected.
-
Review the custom events before you use them in an ad. See Review custom events.
-
Create a Meta Pixel, if you do not have one. See the Meta Pixel setup documentation, then add it to your website.
-
Open the Connect tab of your quiz, find Meta Pixel, and click
connect. -
Enter your
Meta Pixel ID. -
Open the Meta Events Manager. Click
Test events, enter your website URL, then take the quiz on your site. Events such asViewContent,LeadandRetakeQuizshould appear as you go.If they do, the Pixel is connected.
-
Review the custom events before you use them in an ad. See Review custom events.
-
Create a Meta Pixel, if you do not have one. See the Meta Pixel setup documentation, then add it to your website.
-
Open the Connect tab of your quiz, find Meta Pixel, and click
connect. -
Enter your
Meta Pixel ID. -
Open the Meta Events Manager. Click
Test events, enter your website URL, then take the quiz on your site. Events such asViewContent,LeadandRetakeQuizshould appear as you go.If they do, the Pixel is connected.
-
Review the custom events before you use them in an ad. See Review custom events.
What the Meta Pixel tracks
Once the Pixel is connected, the quiz sends an event at each step. They arrive in the Meta Events Manager, where you can build Custom Audiences and Lookalike Audiences from them.
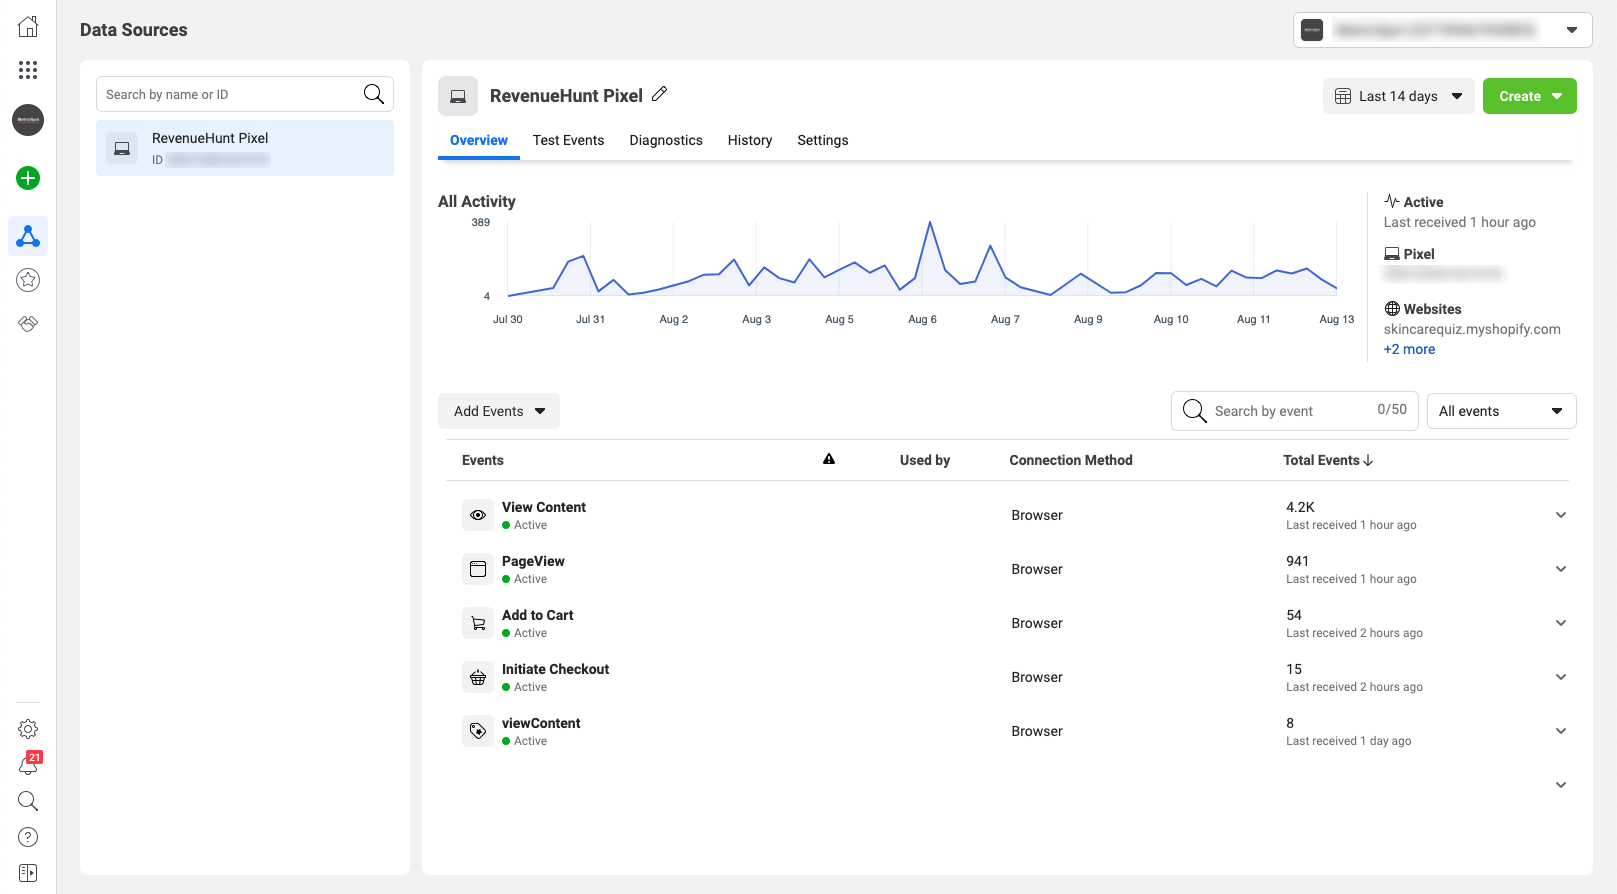
Most of them are ViewContent events, told apart by their content_category. That covers starting the quiz, viewing a question, picking an answer, reaching the results page, and seeing a recommended product. The rest cover adding to the cart, going to the checkout, answering the email or phone question, and retaking the quiz.
| Trigger | fbq action | fbq event | fbq parameters |
|---|---|---|---|
| The customer starts a quiz | track |
ViewContent |
{ content_name: quiz_name, content_category: 'quiz' } |
| The customer views a question | track |
ViewContent |
{ content_name: question_title, content_category: 'question' } |
| The customer clicks a choice | track |
ViewContent |
{ content_name: choice_text, content_category: 'choice' } |
| The customer answers the email question | trackCustom |
EmailLead |
{ content_name: quiz_name, content_category: 'lead' } |
| The customer answers the phone question | trackCustom |
PhoneLead |
{ content_name: quiz_name, content_category: 'lead' } |
| The customer reaches the results page | track |
ViewContent |
{ content_name: results_page_title, content_category: 'results' } |
| The customer reaches the results page | track |
Lead |
{} |
| A product is recommended on the results page | track |
ViewContent |
{ content_name: product_name, content_type: 'recommendation', content_ids: [sku_or_variant_id], value: product_price, currency: quiz_currency } |
| The customer adds a product to the cart | track |
AddToCart |
{ content_name: product_name, content_type: 'recommendation', content_ids: [sku_or_variant_id], value: product_price, currency: quiz_currency } |
| The customer proceeds to the checkout | track |
InitiateCheckout |
{ num_items: num_products_in_cart, currency: quiz_currency, value: value_of_products_in_cart } |
| The customer retakes the quiz | trackCustom |
RetakeQuiz |
{ content_name: quiz_name, content_category: 'quiz' } |
Review custom events
Meta will not let a custom event drive an ads feature until you have reviewed it. The quiz sends two, RetakeQuiz and EmailLead, so review them once and they become usable in audiences.
-
Open your Pixel data source in the Meta Events Manager. New events appear there once the quiz is connected.
Kind Events Standard View Content,Page View,LeadCustom Retake Quiz Action,Email Lead ActionThe data source shows the notice
Custom events can't be used with ads features.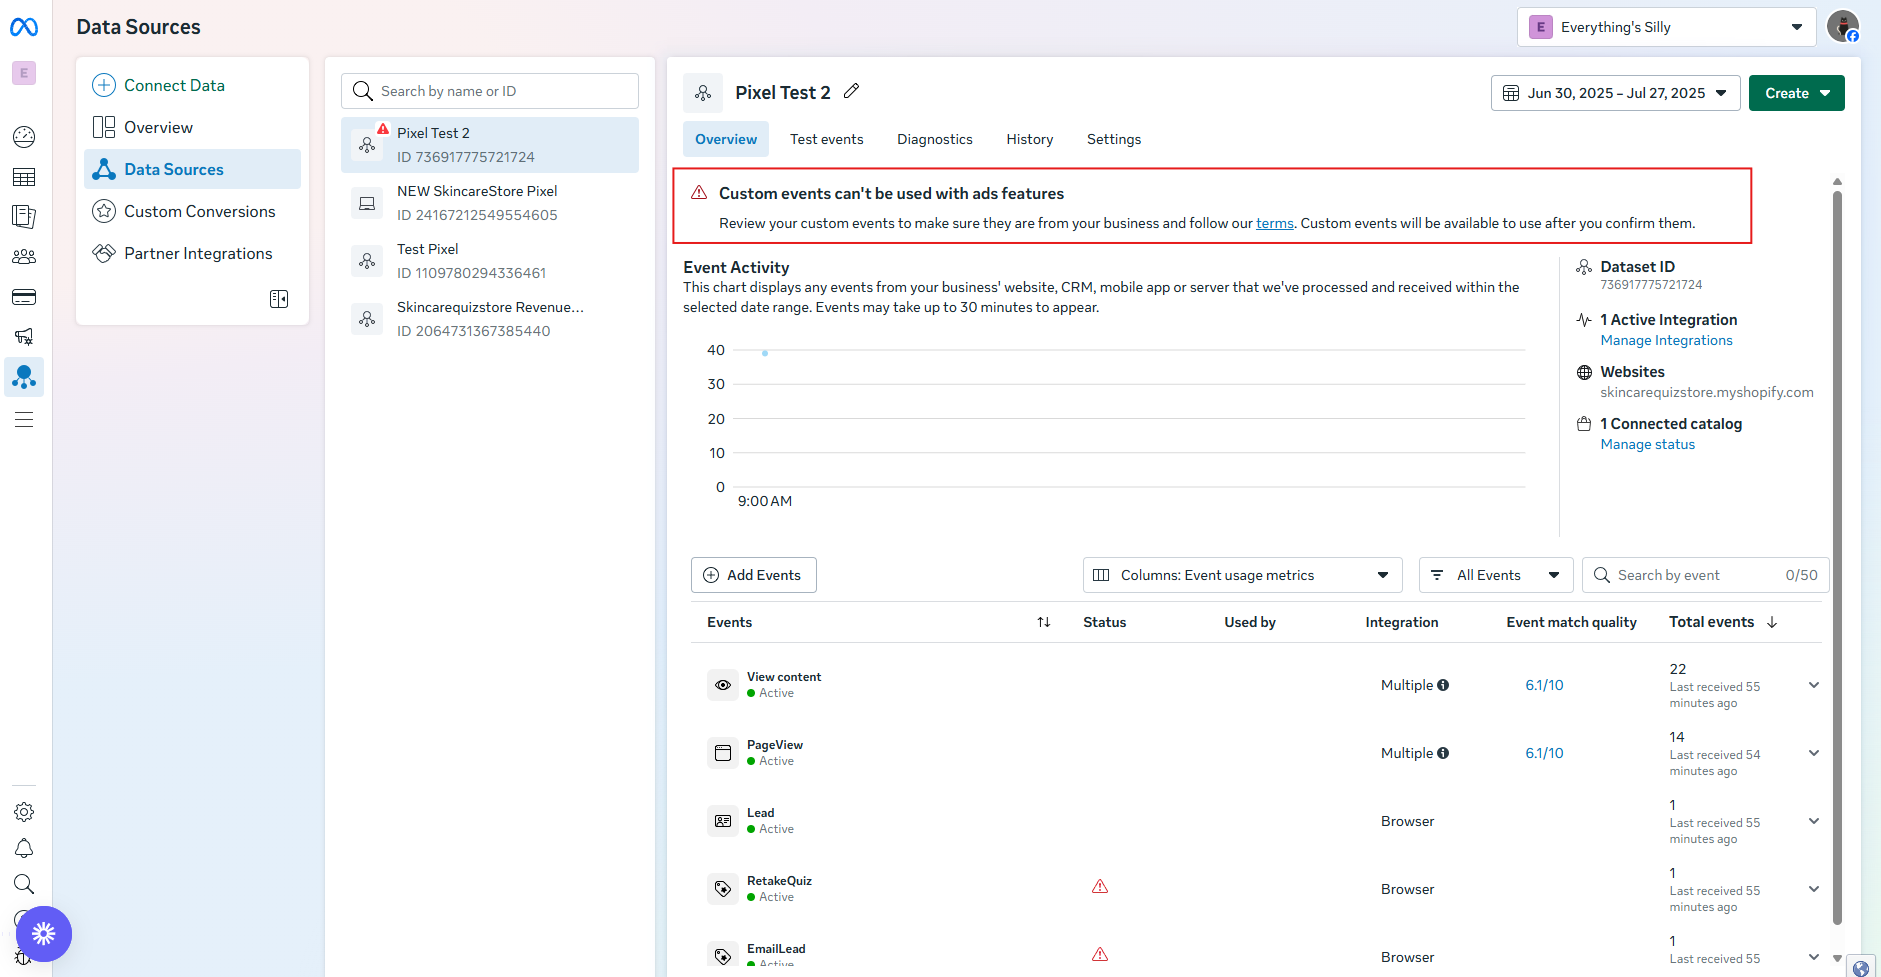
-
Click
Review.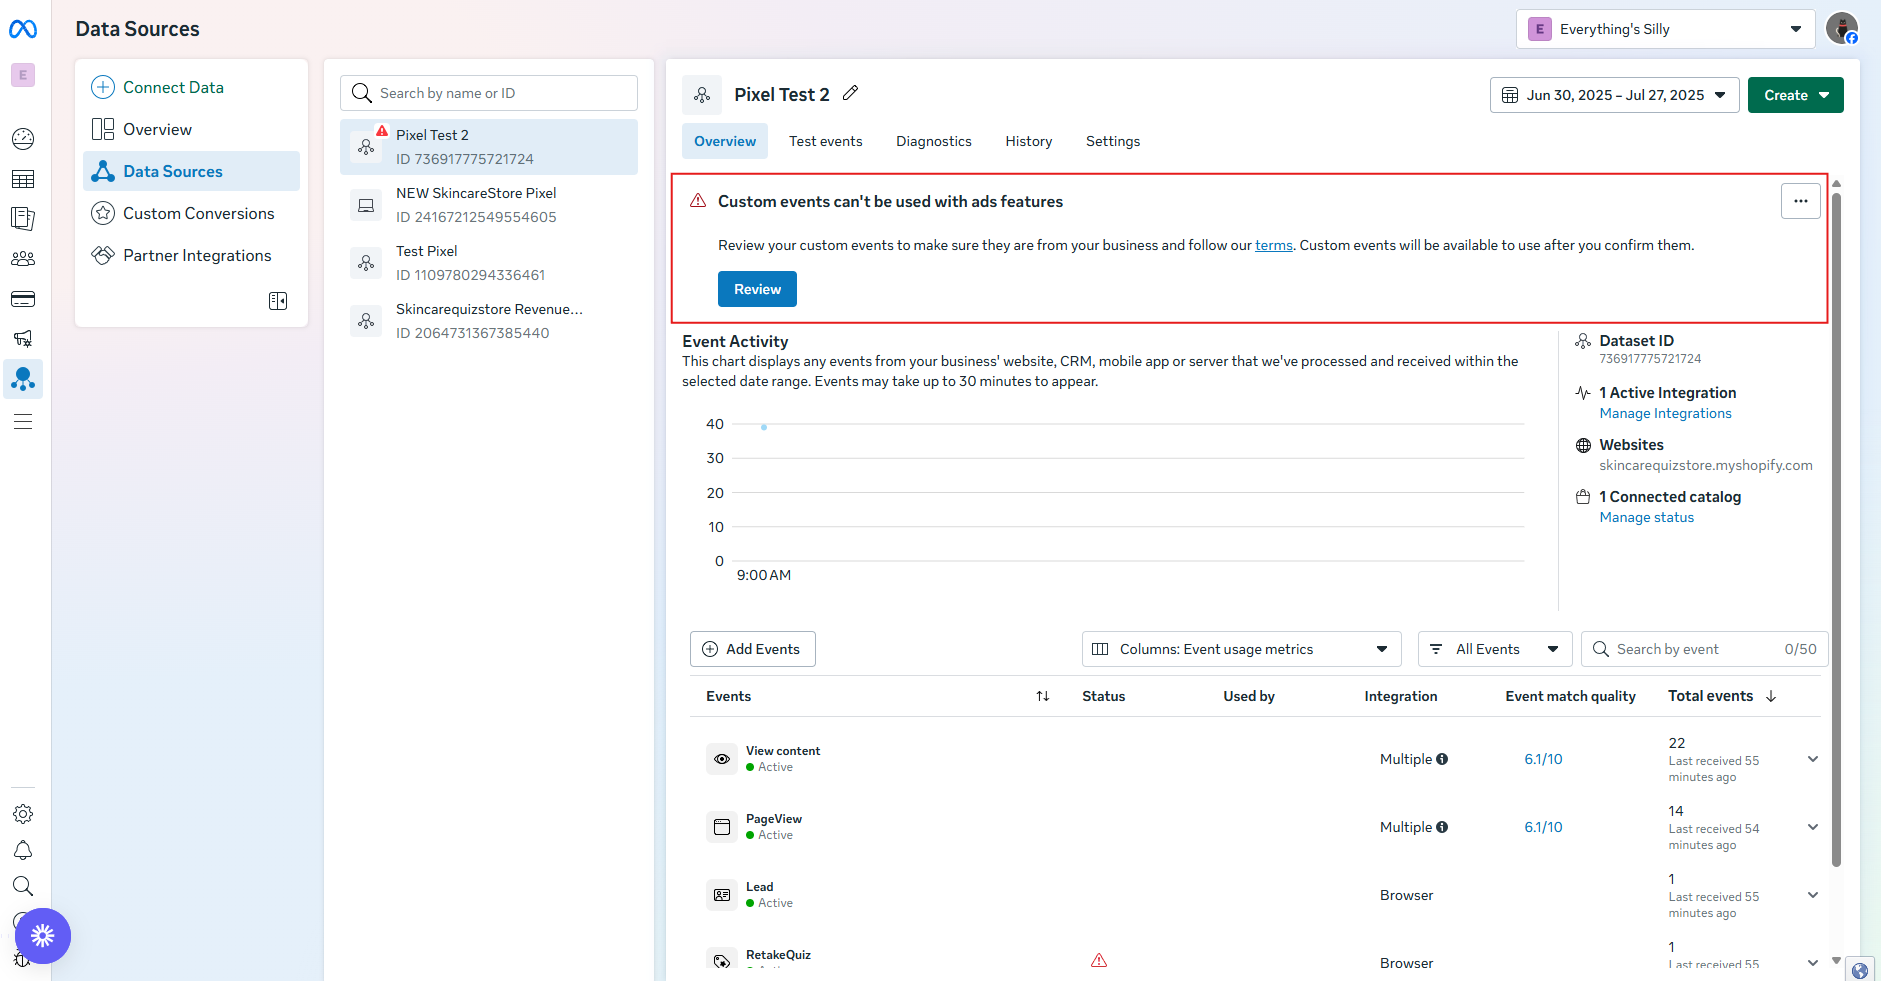
-
Click
Acknowledge, then pick an action for each custom event.Enable both
RetakeQuizandEmailLeadto use either one in an audience. -
Click
Next, thenConfirm. -
Refresh the dashboard and check the notice has gone. The custom events can then be used in your ads, custom audiences and lookalike audiences.
Track your own events with code
The built-in integration sends the events listed on this page. To send an event of your own, write it in the Custom JS section of the results page or of a question.
The callbacks do not exist in this version
prqQuizCallback belongs to the five older versions, not to Built for Shopify. Use window.quiz and the quiz context object here. See how to add JavaScript to the quiz.
-
Open the results page and expand its
Custom JSsection. -
Call
fbqwith the event you want. Thequizobject holds the answers, the chosen results page and the recommended products. -
Click the top-right
Savebutton. -
Take the quiz, then check the event arrives in
Test eventsin the Meta Events Manager.
Sending an event on every answer
Assign a handler to window.quiz.onChange in the Custom JS of the first question. It fires after every answer and stays registered for the rest of the quiz. See how to add JavaScript to the quiz.
The built-in integration sends the events listed on this page. To send events of your own instead, use the callback function with fbq.
-
Turn the built-in integration off. If you connected a Pixel in the Connect tab, disconnect it and publish, so the same action is not counted twice.
-
Add the script to the page that holds the quiz. To load it everywhere, put it in
theme.liquid. -
Change the event name and the parameters to whatever you want to record. The first argument is the
fbqaction,trackfor a standard event ortrackCustomfor one of your own. -
Take the quiz, then check the event arrives in
Test eventsin the Meta Events Manager.
Sending an event on every answer
Add prqSlideCallback alongside it. It fires each time a customer answers a question. See how to use callback function.
The built-in integration sends the events listed on this page. To send events of your own instead, use the callback function with fbq.
-
Turn the built-in integration off. If you connected a Pixel in the Connect tab, disconnect it and publish, so the same action is not counted twice.
-
Add the script to the page that holds the quiz. To load it everywhere, put it in your theme's main template.
-
Change the event name and the parameters to whatever you want to record. The first argument is the
fbqaction,trackfor a standard event ortrackCustomfor one of your own. -
Take the quiz, then check the event arrives in
Test eventsin the Meta Events Manager.
Sending an event on every answer
Add prqSlideCallback alongside it. It fires each time a customer answers a question. See how to use callback function.
The built-in integration sends the events listed on this page. To send events of your own instead, use the callback function with fbq.
-
Turn the built-in integration off. If you connected a Pixel in the Connect tab, disconnect it and publish, so the same action is not counted twice.
-
Add the script to the page that holds the quiz. To load it everywhere, put it in your theme's main template.
-
Change the event name and the parameters to whatever you want to record. The first argument is the
fbqaction,trackfor a standard event ortrackCustomfor one of your own. -
Take the quiz, then check the event arrives in
Test eventsin the Meta Events Manager.
Sending an event on every answer
Add prqSlideCallback alongside it. It fires each time a customer answers a question. See how to use callback function.
The built-in integration sends the events listed on this page. To send events of your own instead, use the callback function with fbq.
-
Turn the built-in integration off. If you connected a Pixel in the Connect tab, disconnect it and publish, so the same action is not counted twice.
-
Add the script to the page that holds the quiz. To load it everywhere, put it in your theme's main template.
-
Change the event name and the parameters to whatever you want to record. The first argument is the
fbqaction,trackfor a standard event ortrackCustomfor one of your own. -
Take the quiz, then check the event arrives in
Test eventsin the Meta Events Manager.
Sending an event on every answer
Add prqSlideCallback alongside it. It fires each time a customer answers a question. See how to use callback function.
The built-in integration sends the events listed on this page. To send events of your own instead, use the callback function with fbq.
-
Turn the built-in integration off. If you connected a Pixel in the Connect tab, disconnect it and publish, so the same action is not counted twice.
-
Add the script to the page that holds the quiz. To load it everywhere, put it in your theme's main template.
-
Change the event name and the parameters to whatever you want to record. The first argument is the
fbqaction,trackfor a standard event ortrackCustomfor one of your own. -
Take the quiz, then check the event arrives in
Test eventsin the Meta Events Manager.
Sending an event on every answer
Add prqSlideCallback alongside it. It fires each time a customer answers a question. See how to use callback function.
This article explains how to connect the Meta Pixel to your quiz, and which events the quiz then sends. It also covers sending events of your own.