How to Change Checkout Settings on Your Results Page
The checkout settings decide where a customer goes from the results page: to the cart, to the checkout, or to the product page.
Open the checkout settings
-
Open the Results page tab in the Quiz builder.
-
Open the Results page settings.
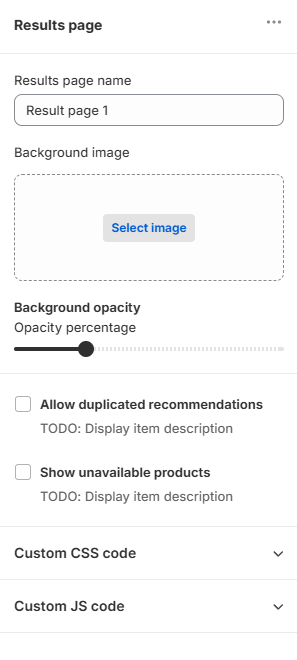
-
Open the
Checkout optionssection.
The section holds the bar that sits at the foot of the results page.
Show bar - Clear it to hide the checkout bar altogether.
Show "retake quiz" button - Clear it to hide the retake button.
Show cart/checkout options - Opens the cart and checkout settings, covered in Add the products to the cart.
-
Open the Results Page tab in the Quiz Builder.
-
Click the cog icon to open the Results Page settings.
-
Open the
Basicsection and findCheckout Settings.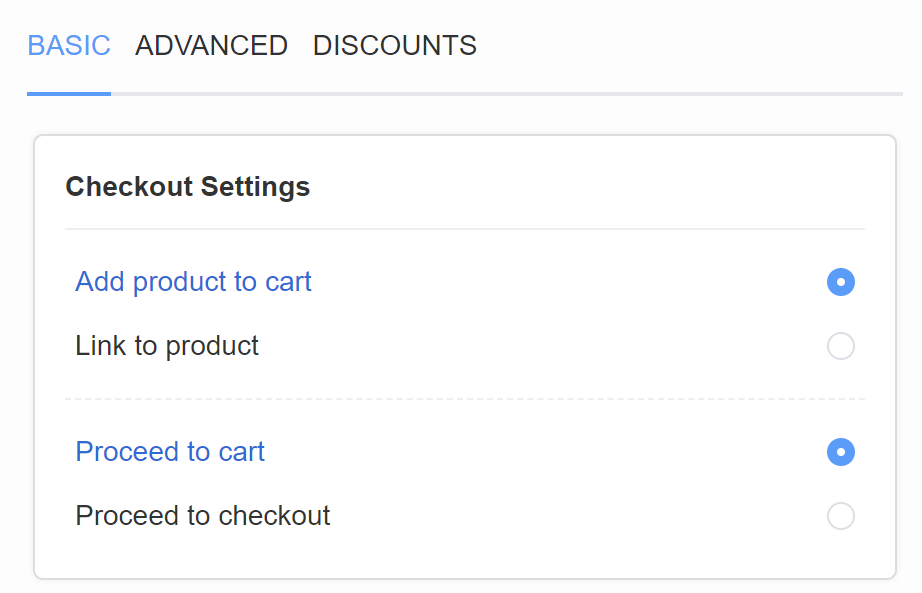
Checkout Settings holds two choices, and they are mutually exclusive. Either the results page adds products to the cart, or it links to the product page.
-
Open the Results Page tab in the Quiz Builder.
-
Click the cog icon to open the Results Page settings.
-
Open the
Basicsection and findCheckout Settings.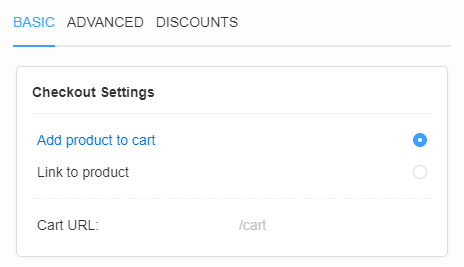
Checkout Settings holds two choices, and they are mutually exclusive. Either the results page adds products to the cart, or it links to the product page.
-
Open the Results Page tab in the Quiz Builder.
-
Click the cog icon to open the Results Page settings.
-
Open the
Basicsection and findCheckout Settings.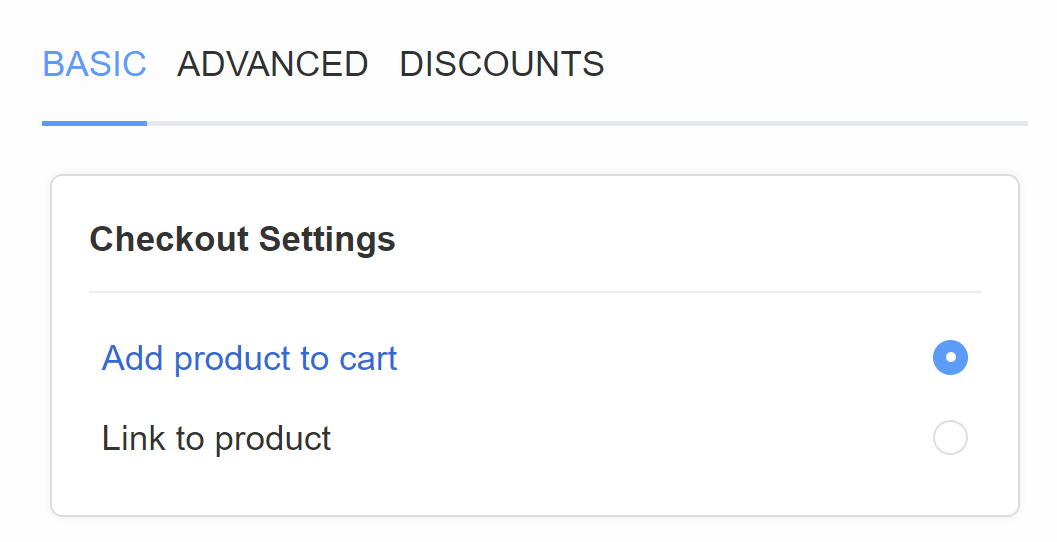
Checkout Settings holds two choices, and they are mutually exclusive. Either the results page adds products to the cart, or it links to the product page.
-
Open the Results Page tab in the Quiz Builder.
-
Click the cog icon to open the Results Page settings.
-
Open the
Basicsection and findCheckout Settings.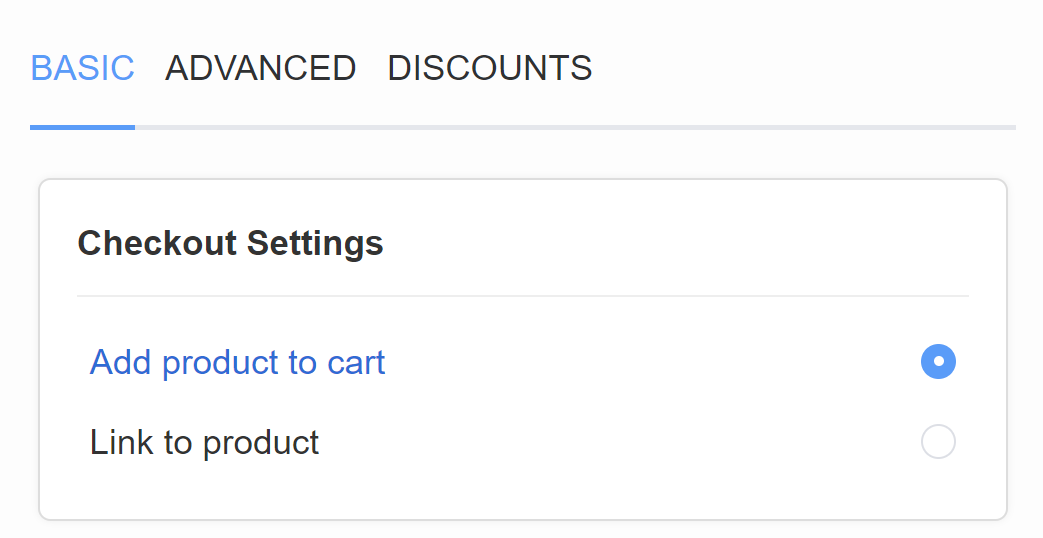
Checkout Settings holds two choices, and they are mutually exclusive. Either the results page adds products to the cart, or it links to the product page.
-
Open the Results Page tab in the Quiz Builder.
-
Click the cog icon to open the Results Page settings.
-
Open the
Basicsection and findCheckout Settings.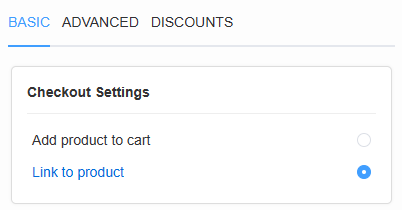
This version holds one choice, Link to product. See Link to the product page.
Add the products to the cart
In Checkout options, turn on Show cart/checkout options.
Enable "Add all to cart" button - Clear it to take the button out of the footer. While it is on, the button shows only when none of the recommended products are in the cart yet.
Next destination - Where the customer goes once the products are in the cart.
Proceed to cartsends them to the cart page, where they can review what the quiz picked.Proceed to checkoutsends them straight to checkout, past the cart.
Then click the top-right Save button.
Select Add product to cart. The results page then adds the recommended products to the cart, and the customer carries on to buy them.
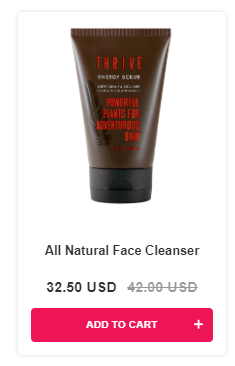
Choose where they land next:
proceed to cartsends them to the cart page, where they can review what the quiz picked.proceed to checkoutsends them straight to checkout, past the cart.
Then click the top-right Publish button.
Select Add product to cart. The results page then adds the recommended products to the cart, and the customer carries on to buy them.
Then set Cart URL to where they land next:
/cartsends them to the cart page, where they can review what the quiz picked./checkoutsends them straight to checkout, past the cart.
Then click the top-right Publish button.
Select Add product to cart. The results page then adds the recommended products to the cart, and the customer carries on to buy them.
The customer goes to the cart, where they can review what the quiz picked.
Then click the top-right Publish button.
Select Add product to cart. The results page then adds the recommended products to the cart, and the customer carries on to buy them.
The customer goes to the cart, where they can review what the quiz picked.
Then click the top-right Publish button.
Not available in this version
There is no cart to add to here. The results page links to the product page instead, as Link to the product page describes.
To build cart behavior of your own, send the quiz data to your own results page with a callback function.
Link to the product page
In this version the product link is a component of the product card, not a checkout setting. Swap the button on the card.
-
Open the Results page tab and select your Product block.
-
Open
Product components layoutin the block settings. -
Remove the
Add to cart buttoncomponent. -
Click
+ blockand addLink to product. It adds a button that opens the product URL.
-
Click the top-right
Savebutton.
The link only opens on a live storefront
It does nothing in the quiz preview, or on a password-protected store.
Select Link to product. The results page then shows a view product button in place of the add to cart action, and the customer reads the product page before deciding.
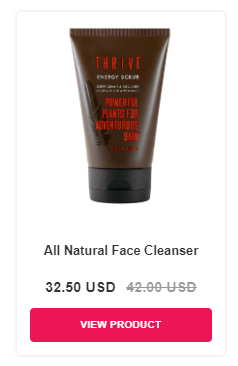
Choosing this turns the add to cart feature off.
Then click the top-right Publish button.
Select Link to product. The results page then shows a view product button in place of the add to cart action, and the customer reads the product page before deciding.
Choosing this turns the add to cart feature off.
Then click the top-right Publish button.
Select Link to product. The results page then shows a view product button in place of the add to cart action, and the customer reads the product page before deciding.
Choosing this turns the add to cart feature off.
Then click the top-right Publish button.
Select Link to product. The results page then shows a view product button in place of the add to cart action, and the customer reads the product page before deciding.
Choosing this turns the add to cart feature off.
Then click the top-right Publish button.
Link to product is the only checkout setting in this version. The results page shows a view product button that opens the product page, and there is no add to cart action.
Then click the top-right Publish button.
This article explains how to set where a customer goes from the results page: to the cart, to the checkout, or to the product page.