How to Send Leads to Mailchimp
Apart from giving your customers personalized product recommendations, you can connect your quiz to Mailchimp. This way all the contacts coming from the quiz are added to your Mailchimp audience, where you can segment them and follow up with targeted campaigns.
This article explains how to connect your RevenueHunt account to Mailchimp, send quiz taker contacts to your audience, tag them based on their answers and build segments and automations around those tags.
Before you begin
Make sure your quiz collects email addresses. Open your quiz in the Quiz Builder and check for an email question block. If there isn't one, click Add Question and select Email Address from the question types. You can also add it to an existing slide from the Add Block menu.
(optional) Ask for marketing consent. Add a marketing consent checkbox directly below the email field. This lets quiz takers agree to receive marketing emails, which is useful for GDPR compliance. See How to Ask for Marketing Consent.
What data is sent to Mailchimp
Mailchimp receives the contact's email, first name, last name and phone number when provided. Quiz customer tags and result tags are also synced to the contact's profile in Mailchimp as contact tags.
Full quiz answers and product recommendations are not synced to Mailchimp directly. To learn more about how Mailchimp handles contact data fields, see the Mailchimp merge fields documentation.
If you need the full answers and recommended products in your email templates, use Klaviyo, HubSpot or Omnisend instead, or check the alternative ways to send quiz leads to Mailchimp.
This article explains how to send leads to Mailchimp from your quiz.
Automating the transfer of quiz leads to your Mailchimp account can help you improve your email marketing campaigns by segmenting your audience and sending them personalized follow-up emails.
Important Considerations
- Limited Data Transfer: Mailchimp integration only supports email, name, and customer tags to be send from the quiz. For more complex emailing/data needs, including direct product recommendations, consider using a different service.
- Alternative Services: For functionality beyond basic data transfer, platforms like Klaviyo, HubSpot or Omnisend are recommended. These services offer more robust integration options for personalized follow-ups.
Before you begin, ensure you have:
- An active Mailchimp account.
- A RevenueHunt Product Recommendation Quiz that you wish to connect with Mailchimp.
Link Quiz to Mailchimp
The Mailchimp integration uses OAuth to securely connect your RevenueHunt account to Mailchimp. This connection is made at the account level, meaning once connected, all quizzes in that account gain the option to send leads to Mailchimp.
Connect your account to Mailchimp
- Open the RevenueHunt app and navigate to any quiz.
- Go to the
Quiz Settings > Integrationstab. - Scroll down to the
Mailing & CRMssection and find the Mailchimp card. - Click the
Connectbutton. - You will be redirected to a Mailchimp authentication page. Log in to your Mailchimp account and click
Allowto grant access. - Once authenticated, you will be redirected back to the quiz settings, where Mailchimp will now show a
Connectedbadge.
Enable Mailchimp for each quiz
Connecting via OAuth links your entire RevenueHunt account, but it does not automatically start sending leads from every quiz. You need to enable it individually per quiz.
- For each quiz you want to send data from, open that quiz's
Quiz Settings > Integrationstab. - Find the Mailchimp section and check the
Send Quiz Leads to Mailchimpcheckbox. - Click the top
Savebutton to save your changes.
Stop sending data from a single quiz
If you want to stop data from a specific quiz flowing to Mailchimp, simply uncheck the Send Quiz Leads to Mailchimp checkbox in that quiz and save. You do not need to disconnect Mailchimp entirely. See Disconnect Mailchimp for the account-level option.
Test the connection
Previewyour quiz and complete it with a test name and email address, all the way through to the results page.- Go to Mailchimp and open
Audience, then search for your test email. It may take a moment to appear, so refresh the page if needed. - You should see the new contact with any tags that were applied based on the answer choices they selected. If you tagged all answers in one question with a general tag like
revenuehuntorquiz, you should see that tag on the profile as well.
Tip
You can use your real email with a +test1, +test2 suffix to test different answering routes. For example, youremail+test1@email.com or youremail+test2@email.com.
Connecting your quiz to Mailchimp allows for the seamless transfer of leads:
- Locate your quiz and click on the Connect tab at the top of the interface.
-
Find the Mailchimp section and click on the
Connectbutton. This action will redirect you to a Mailchimp login page in a new tab.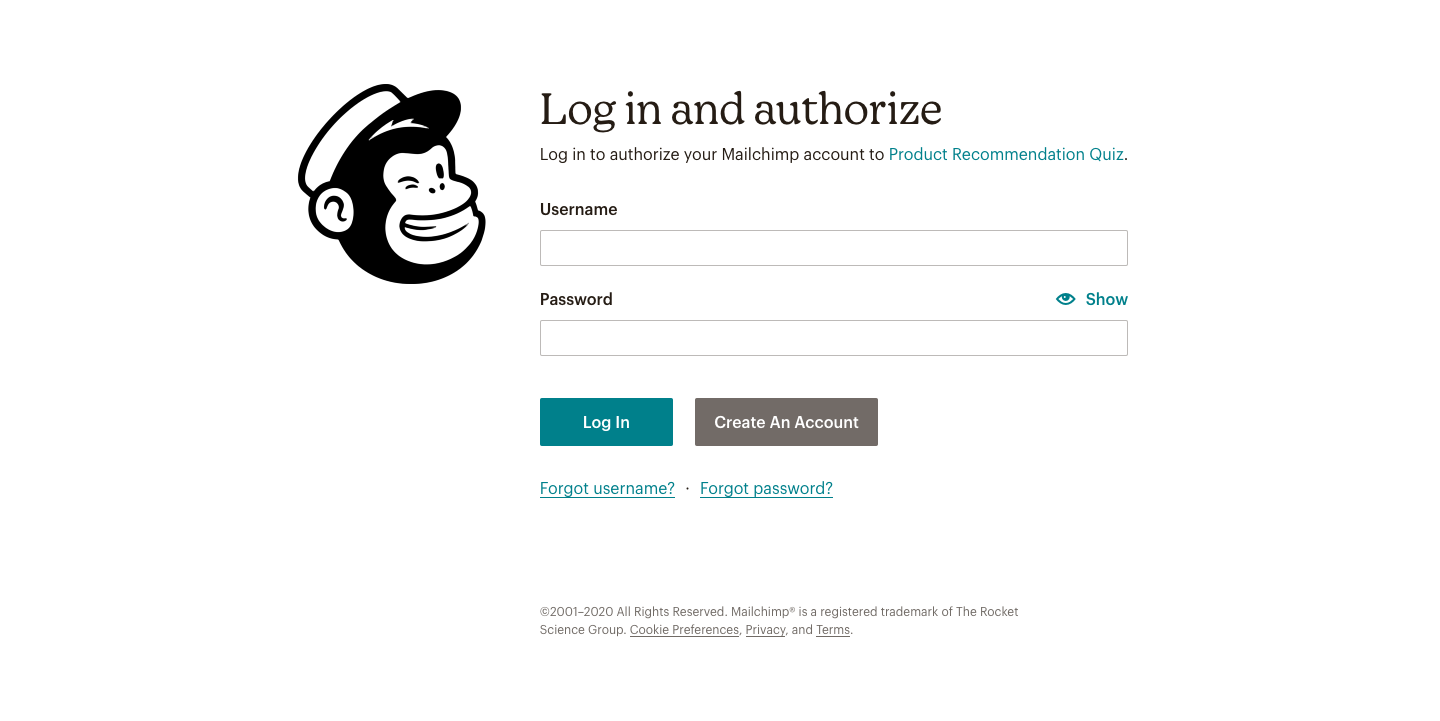
-
Log into your Mailchimp account and authorize the app by clicking on
Allow.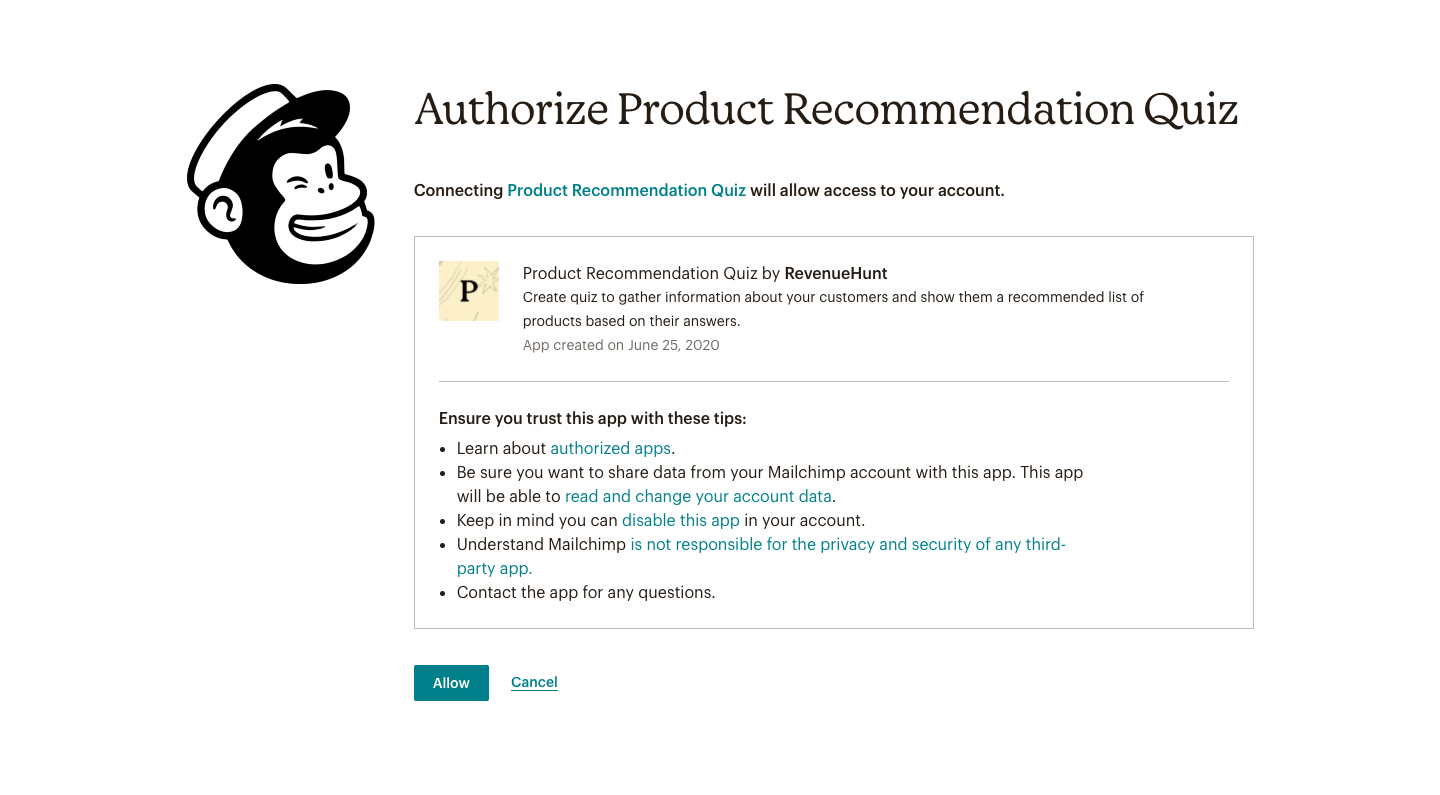
-
If the connection was successful, you'll see a
Mailchimp got connected, please close this windows to go back to the dashboard.message. -
After authorization, your quiz is connected to Mailchimp, and you can proceed to link it to a specific mailing list.
-
Return to the Connect tab in your quiz platform. You may need to refresh the page to update the connection status.
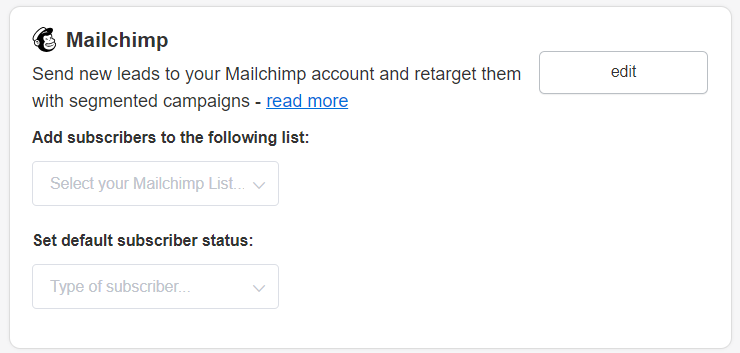
- Follow the prompts to select the Mailchimp list you wish to send your quiz results to from the dropdown.
Connecting your quiz to Mailchimp allows for the seamless transfer of leads:
- Locate your quiz and click on the Connect tab at the top of the interface.
-
Find the Mailchimp section and click on the
Connectbutton. This action will redirect you to a Mailchimp login page in a new tab. -
Log into your Mailchimp account and authorize the app by clicking on
Allow. -
If the connection was successful, you'll see a
Mailchimp got connected, please close this windows to go back to the dashboard.message. -
After authorization, your quiz is connected to Mailchimp, and you can proceed to link it to a specific mailing list.
-
Return to the Connect tab in your quiz platform. You may need to refresh the page to update the connection status.
- Follow the prompts to select the Mailchimp list you wish to send your quiz results to from the dropdown.
Add Quiz Contacts to a Mailchimp Audience
Once your account is connected, you can choose which Mailchimp audience quiz takers are added to. The audience selector lives inside the email question block.
- Make sure your account is connected to Mailchimp and that the
Send Quiz Leads to Mailchimpcheckbox is enabled for the quiz. - In the RevenueHunt app, open the Quiz Builder and click on the email question block to open its settings.
- Under the
Mailchimp Audiencedropdown, select the audience you want quiz takers added to. - Click the top
Savebutton to save your changes.
Per-quiz audiences
If you have multiple quizzes and want each to feed a different audience, open the email question block of each quiz individually and select the appropriate audience there.
The Mailchimp list is selected in the Connect tab, as described in the Link Quiz to Mailchimp section.
The Mailchimp list is selected in the Connect tab, as described in the Link Quiz to Mailchimp section.
The Mailchimp list is selected in the Connect tab, as described in the Link Quiz to Mailchimp section.
The Mailchimp list is selected in the Connect tab, as described in the Link Quiz to Mailchimp section.
The Mailchimp list is selected in the Connect tab, as described in the Link Quiz to Mailchimp section.
Use Customer Tags for Segmentation in Mailchimp
Because full quiz answers don't sync to Mailchimp, we recommend using the Customer Tags field on each quiz answer choice. When a quiz taker selects an answer, that choice's customer tag is sent to Mailchimp as a contact tag, which you can then use to build your own segmentation rules.
Tag your answer choices
- Open your quiz in the Quiz Builder and click on an answer choice to open its Choice Settings.
-
Under
Customer tags, create a tag that describes that choice. For example, if a question asks about skin type, tag theOilychoice withskin-oilyand theDrychoice withskin-dry.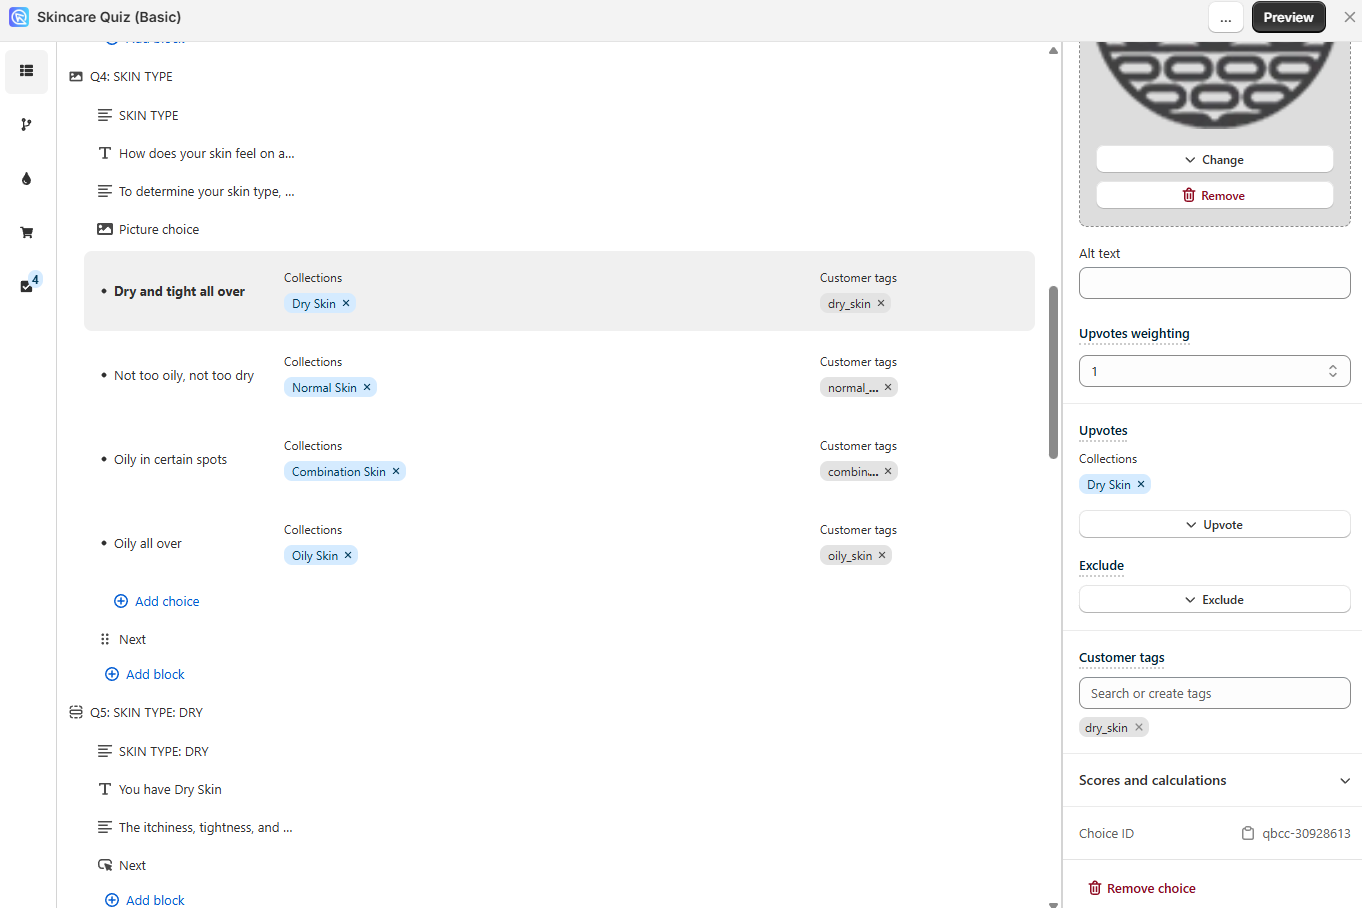
-
Repeat for the remaining choices you want to segment on.
- Tag every answer in at least one question with a general tag like
revenuehuntorquiz. This creates a universal tag for every person who completed the quiz, making it easy to build a Mailchimp segment for all quiz takers. - Click the top
Savebutton to save your changes.
Build a segment in Mailchimp
Once contacts start arriving with tags, you can build segments in Mailchimp based on those tags.
- In Mailchimp, go to
Audience, thenSegments, and clickCreate Segment. - Set the condition to
Contact Tagand select the tag you want to target. - Save the segment.
You can create one segment for all quiz takers using your general revenuehunt tag, and additional segments for specific answer combinations.
With customer tags, you can segment your audience within Mailchimp based on their quiz responses:
- Make sure the quiz is connected to Mailchimp.
-
Create customer tags in the RevenueHunt app and link them to choices.

-
Once done, click the
Publishbutton to update the preview/live quiz with new changes. - Navigate to the
Audiencesection in your Mailchimp account. - Use the customer tags to create segmented lists or groups, allowing for targeted campaign efforts based on the quiz outcomes.
With customer tags, you can segment your audience within Mailchimp based on their quiz responses:
- Make sure the quiz is connected to Mailchimp.
-
Create customer tags in the RevenueHunt app and link them to choices.
-
Once done, click the
Publishbutton to update the preview/live quiz with new changes. - Navigate to the
Audiencesection in your Mailchimp account. - Use the customer tags to create segmented lists or groups, allowing for targeted campaign efforts based on the quiz outcomes.
Hack: Send Quiz Answers to MailChimp
To override Mailchimp's limitation on pushing detailed custom quiz data, you can use customer tags to represent customer responses.
-
For each possible quiz answer, create a corresponding customer tag within your quiz setup. This requires planning to ensure each tag accurately represents the quiz responses.
-
Upon completion of the quiz by a participant, Mailchimp will receive all the tags that the customer picked based on their choices.
To override Mailchimp's limitation on pushing detailed quiz data, you can use customer tags to represent customer responses.
-
For each possible quiz answer, create a corresponding customer tag within your quiz setup. This requires planning to ensure each tag accurately represents the quiz responses.
-
Upon completion of the quiz by a participant, Mailchimp will receive all the tags that the customer picked based on their choices.
Set up Post-Quiz Email Flow with Mailchimp
To send follow-up emails to quiz takers, build an automation in Mailchimp that is triggered by the tags coming from the quiz.
- Connect and tag. Make sure your quiz is connected to Mailchimp and that your answer choices are tagged with customer tags.
- Create the automation. In Mailchimp, go to
Automationsand create a new flow. - Set the trigger. Set the flow to trigger when a contact receives one of the tags applied through the quiz.
- Add an email step. Add an email step and design your message.
- Personalize with tags. Because full quiz answers and product recommendations do not sync to Mailchimp, email personalization is based on the tags added to each contact's profile. Use Mailchimp's dynamic content visibility settings to display different text depending on the tags assigned to each contact.
- Publish. Continue building your automation, then publish it once it is ready.
Example
Imagine you run a skincare eCommerce store. Your quiz asks customers about their skin type and concerns. Based on their answers, you tag them as “Oily Skin,” “Dry Skin,” etc.
In MailChimp, you create an email series targeting these tags. For instance:
- Day 1: Introduction to products suitable for oily skin.
- Day 3: Customer testimonials and reviews for oily skin products.
- Day 7: Special discount on recommended products for oily skin.
Tip
Remember to preview the quiz leaving a sample email address in order to send the first data to Mailchimp and test the flow. You can use your real email with a +test1, +test2 suffix to test different answering routes. For example, youremail+test1@email.com or youremail+test2@email.com.
If you want to set up a post-quiz email flow with Mailchimp, you can follow the steps below:
-
Connect Your Quiz to MailChimp. Follow the instructions in the Link Quiz to Mailchimp section.
Tip
Remember to take a test quiz/preview the quiz leaving a sample email address in order to send first data to MailChimp and test the connection. You can use your real email with a +test1, +test2 to test different answering routes. For example, youremail+test1@email.com or youremail+test2@email.com.
-
Use Customer Tags for Segmentation. Once your quiz is connected you should consider what data you want to send to MailChimp from the quiz. You can, for example:
- Create customer tags in your quiz to represent different quiz responses.
- Link these tags to specific answers in your quiz.
- Upon completion of the quiz by a participant, Mailchimp will receive all the tags that the customer picked based on their choices.
- In MailChimp, you can use these tags to segment your audience and tailor your email campaigns.
Warning
Mailchimp API only supports email, name, and customer tags to be send from the quiz. To override Mailchimp’s limitation on pushing detailed quiz data, you can use customer tags to represent customer responses.
-
Design Email Campaigns. Once the quiz answers are covered with customer tags, all the information you need about your customer will start flowing into MailChimp. That’s when you can set up your email campaigns.
- You can start by setting up Automations (automated email flows) to trigger based on specific tags or quiz completions.
- Then, create different email templates in MailChimp that correspond to different quiz outcomes or automation flows.
Example
Imagine you run a skincare eCommerce store. Your quiz asks customers about their skin type and concerns. Based on their answers, you tag them as “Oily Skin,” “Dry Skin,” etc.
In MailChimp, you create an email series targeting these tags. For instance:
- Day 1: Introduction to products suitable for oily skin.
- Day 3: Customer testimonials and reviews for oily skin products.
- Day 7: Special discount on recommended products for oily skin.
-
Test and Optimize. After setting up your email campaigns, test them with a test email and optimize them based on the results.
Disconnect Mailchimp
Stop sending data from one quiz
Uncheck the Send Quiz Leads to Mailchimp checkbox in that specific quiz's Quiz Settings > Integrations tab and click Save. Other quizzes in the account keep sending data to Mailchimp.
Disconnect Mailchimp from your account
- Go to
Quiz Settings > Integrations. - Scroll to the Mailchimp card and click
Disconnect. - Confirm the action.
No more quiz data will flow to Mailchimp from any quiz in the account.
Open the Connect tab in your quiz, scroll to the Mailchimp section and remove the connection. Then click the Publish button to update the preview/live quiz with the new settings.
Open the Connect tab in your quiz, scroll to the Mailchimp section and remove the connection. Then click the Publish button to update the preview/live quiz with the new settings.
Open the Connect tab in your quiz, scroll to the Mailchimp section and remove the connection. Then click the Publish button to update the preview/live quiz with the new settings.
Open the Connect tab in your quiz, scroll to the Mailchimp section and remove the connection. Then click the Publish button to update the preview/live quiz with the new settings.
Open the Connect tab in your quiz, scroll to the Mailchimp section and remove the connection. Then click the Publish button to update the preview/live quiz with the new settings.
Alternative Ways to Send Quiz Leads to Mailchimp
Sometimes, you would like a bit more control over the data that is sent to Mailchimp, for example to pass full quiz answers or recommended products, which the native integration doesn't sync. In that case there are a few alternatives you can use.
- Using Shopify Customers: You can use Shopify Customers to send quiz leads to Mailchimp. Just connect your quiz to Shopify Customers following this guide. Then, use a native Shopify - Mailchimp integration to send the quiz leads to Mailchimp.
- Using Webhooks: You can use our Webhooks integration to send quiz leads to Mailchimp. Just connect your quiz to Webhooks following this guide. Then, in Webhooks set up a redirection of selected data to Mailchimp.
- Manually adding the quiz leads to Mailchimp: You can manually add the quiz leads to Mailchimp by uploading a CSV file generated from the quiz responses section.
Sometimes, you would like a bit more control over the data that is sent to Mailchimp. In that case there are a few alternatives you can use to send quiz leads to Mailchimp.
- Using Shopify Customers: You can use Shopify Customers to send quiz leads to Mailchimp. Just connect your quiz to Shopify Customers following this guide. Then, use a native Shopify - Mailchimp integration to send the quiz leads to Mailchimp.
- Using Zapier: You can use out native Zapier integration to send quiz leads to Mailchimp. Just connect your quiz to Zapier following this guide. Then, in Zapier set up a redirection of selected data to Mailchimp.
- Using Webhooks: You can use our Webhooks integration to send quiz leads to Mailchimp. Just connect your quiz to Webhooks following this guide. Then, in Webhooks set up a redirection of selected data to Mailchimp.
- Manually adding the quiz leads to Mailchimp: You can manually add the quiz leads to Mailchimp by uploading a CSV file generated from the quiz metrics > responses section.
Sometimes, you would like a bit more control over the data that is sent to Mailchimp. In that case there are a few alternatives you can use to send quiz leads to Mailchimp.
- Using Zapier: You can use out native Zapier integration to send quiz leads to Mailchimp. Just connect your quiz to Zapier following this guide. Then, in Zapier set up a redirection of selected data to Mailchimp.
- Using Webhooks: You can use our Webhooks integration to send quiz leads to Mailchimp. Just connect your quiz to Webhooks following this guide. Then, in Webhooks set up a redirection of selected data to Mailchimp.
- Manually adding the quiz leads to Mailchimp: You can manually add the quiz leads to Mailchimp by uploading a CSV file generated from the quiz metrics > responses section.
This article explains how to send leads to Mailchimp from your quiz created in the RevenueHunt app.